
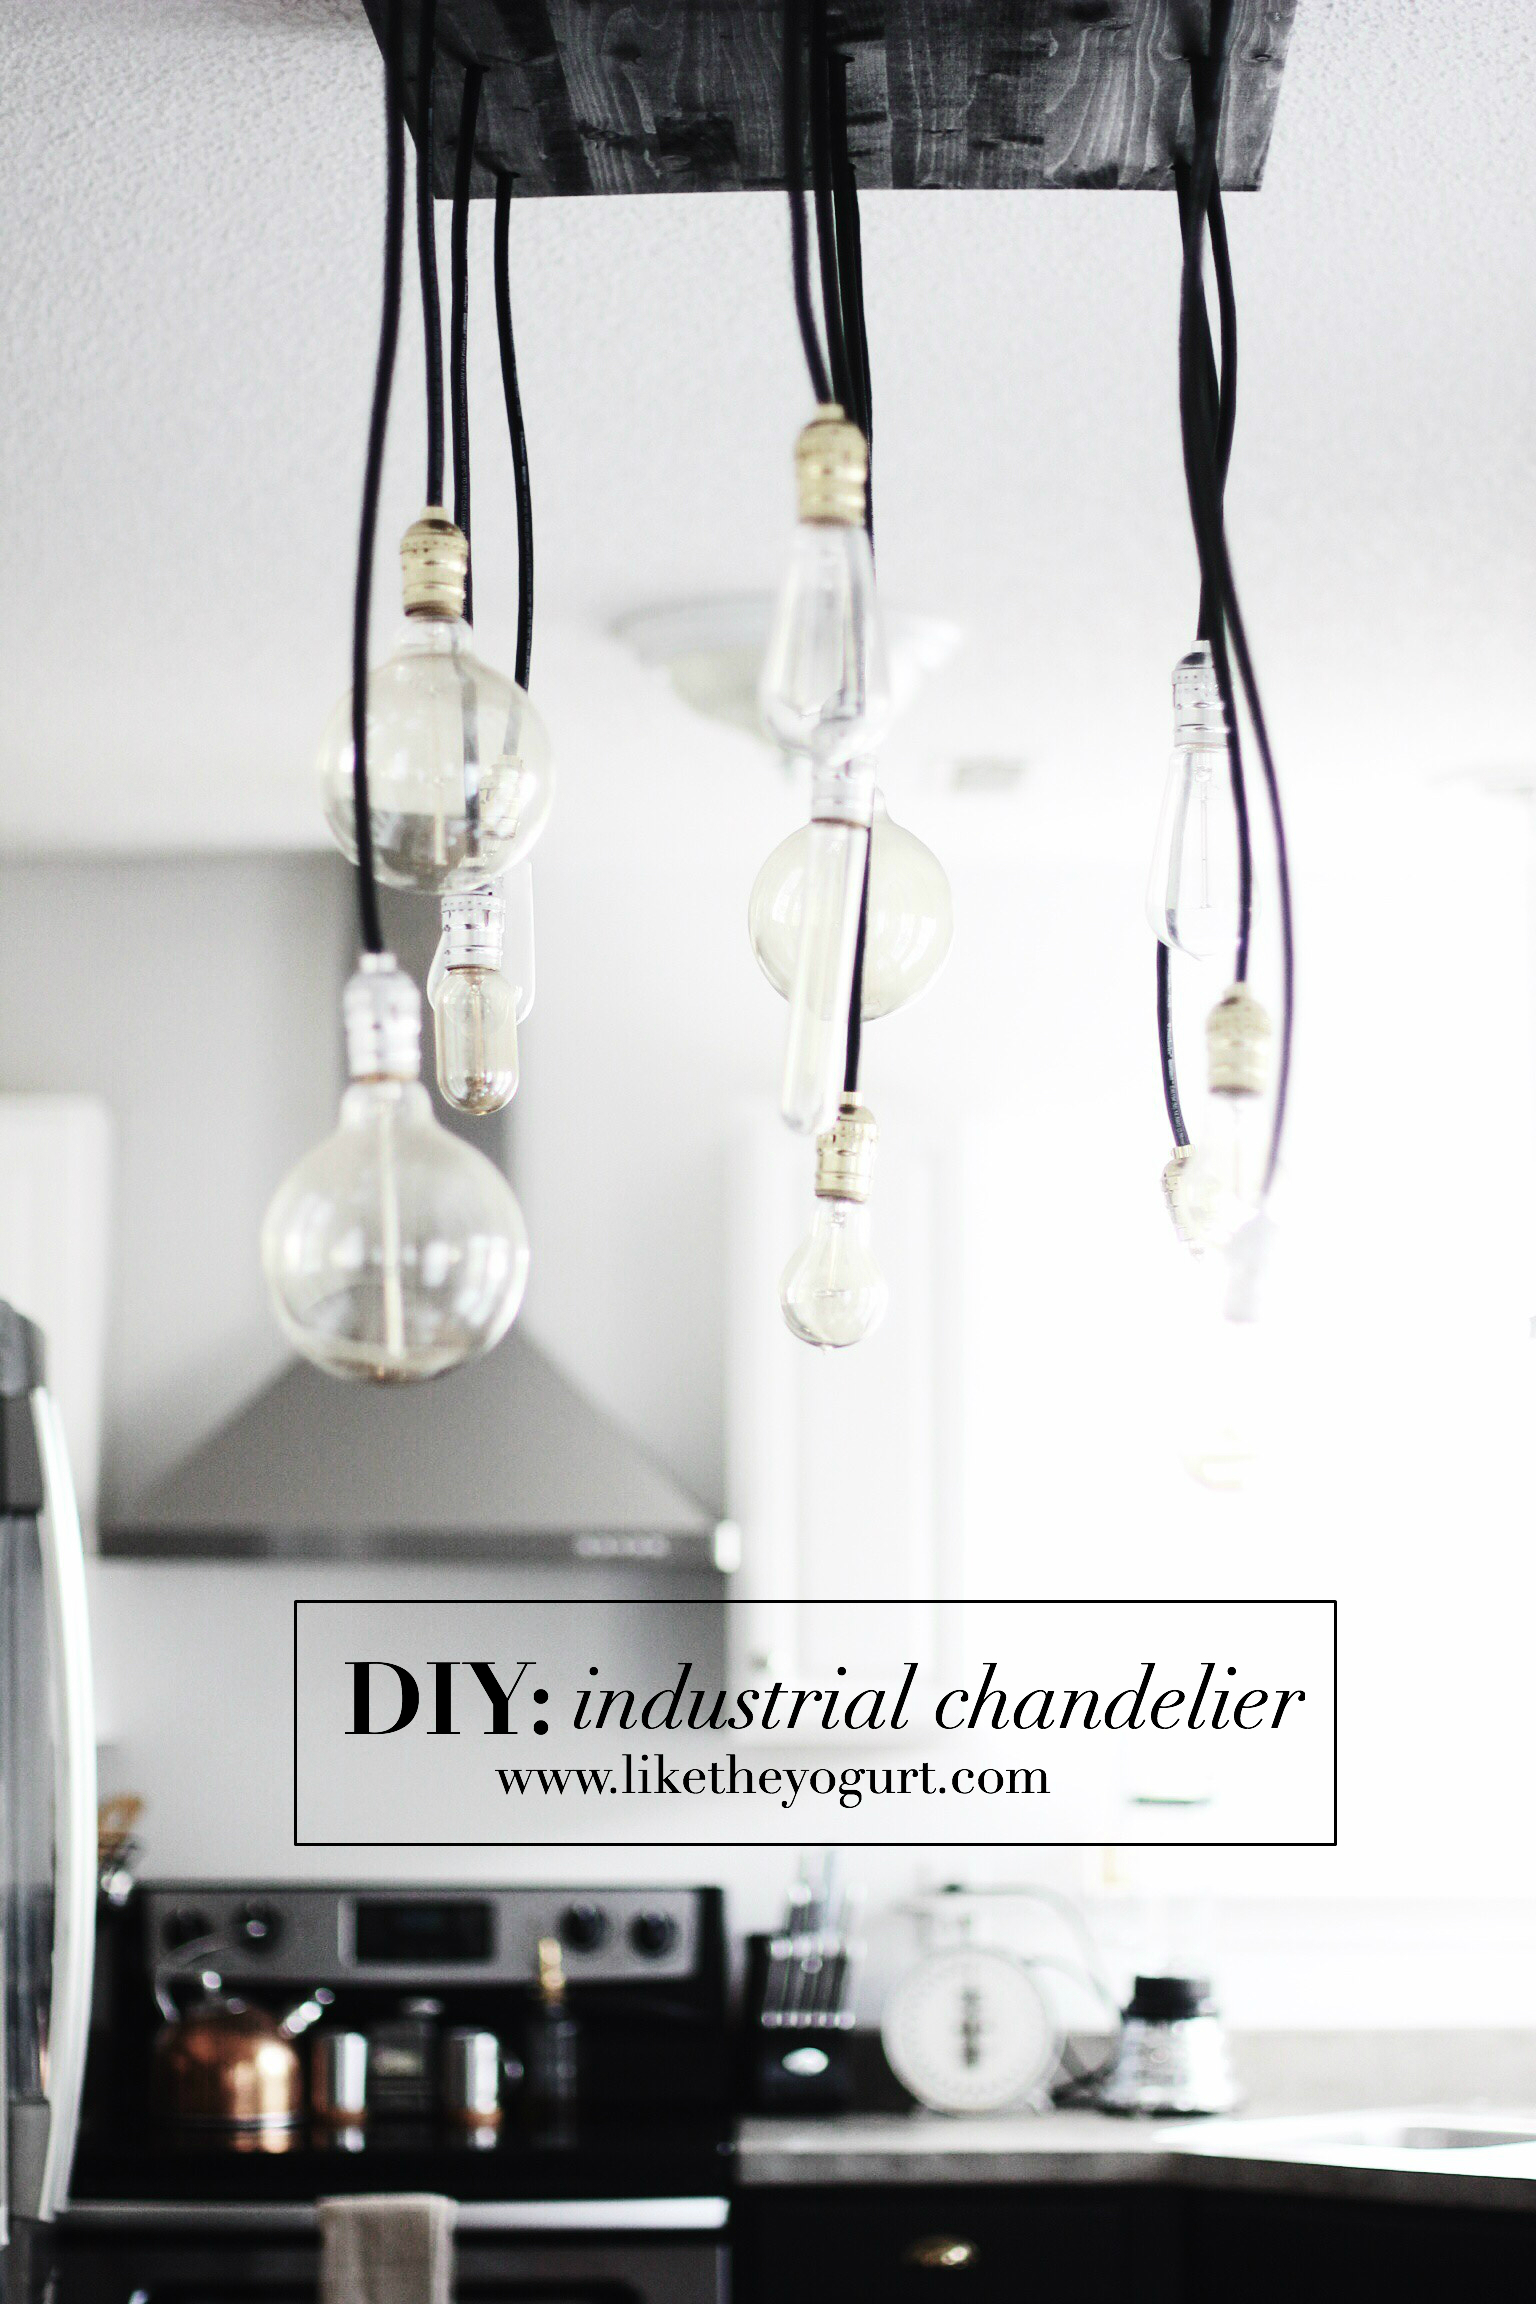
You’ve probably seen from my instagram, and my last post Update: Kitchen Renovation, this light fixture! I have been meaning to post this tutorial for awhile now and I can’t believe it’s taken me this long to post about it! Glad no one else did it before me, because I think this will be the first DIY project my husband and I have ever done without referring to another bloggers how-to. Pretty proud over here if you can’t tell 😉
Without further ado…the DIY Industrial Chandelier!!
I first want to state that I am not a licensed contractor. Be careful when disconnecting your current light and connecting your new light. ALWAYS disconnect power at the breaker box to avoid shock or electrocution.
What you’ll need //
Tools
– drill
– 9/16 or 5/8 drill bit
– tape measure
– wire strippers
– phillips head screwdriver
– pencil
Materials
– 30″ x 20″ piece of wood
– 2 gang junction box
– 15′ 14 awg white wire
– 15′ 14 awg black wire
– 27X wire nuts
– 12X sockets (6 brass, 6 Nickel)
– 3X 8″ 2×4 pieces of wood
– 12 light bulbs (of various Edison styles)
– wood stain (we used ebony)
– old sock or rag for stain
*We used 14/3 SOOW, even though the lights didn’t need the ground. I preferred the 14 gauge wire, which came with 3 wires (couldn’t find one with just two).
Cost: $150 (we had the tools already!) Time: 2-3 hours
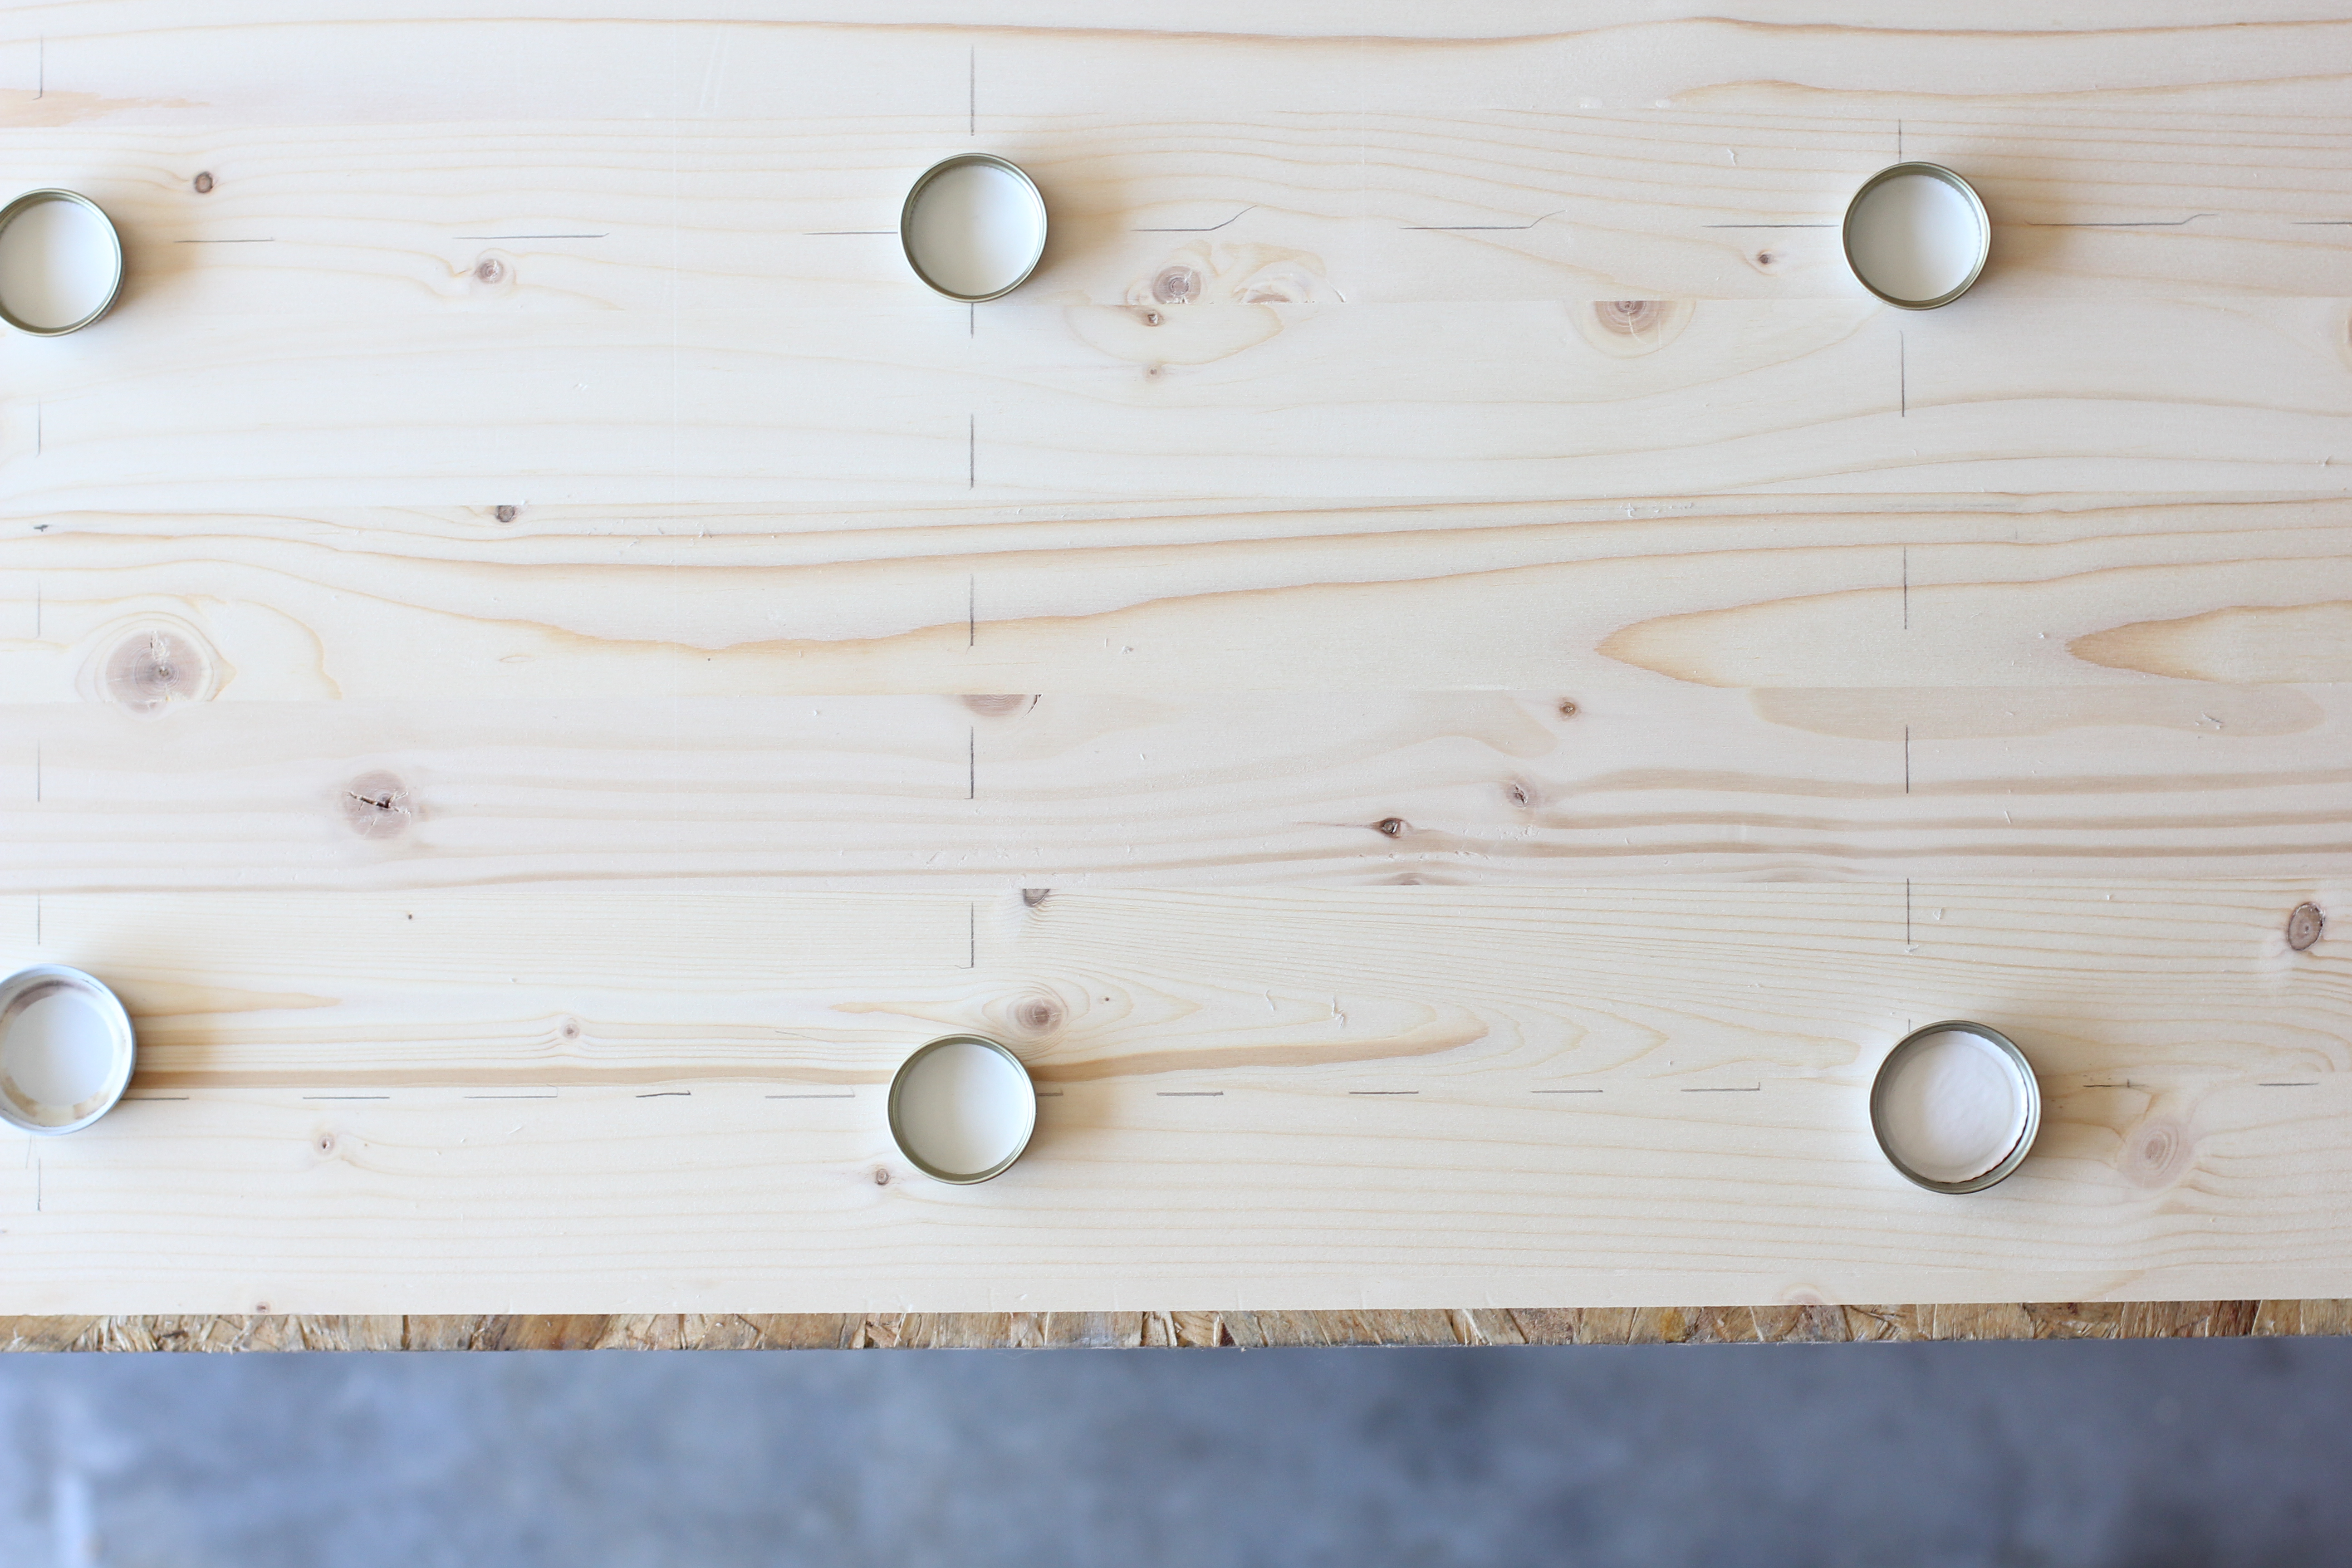
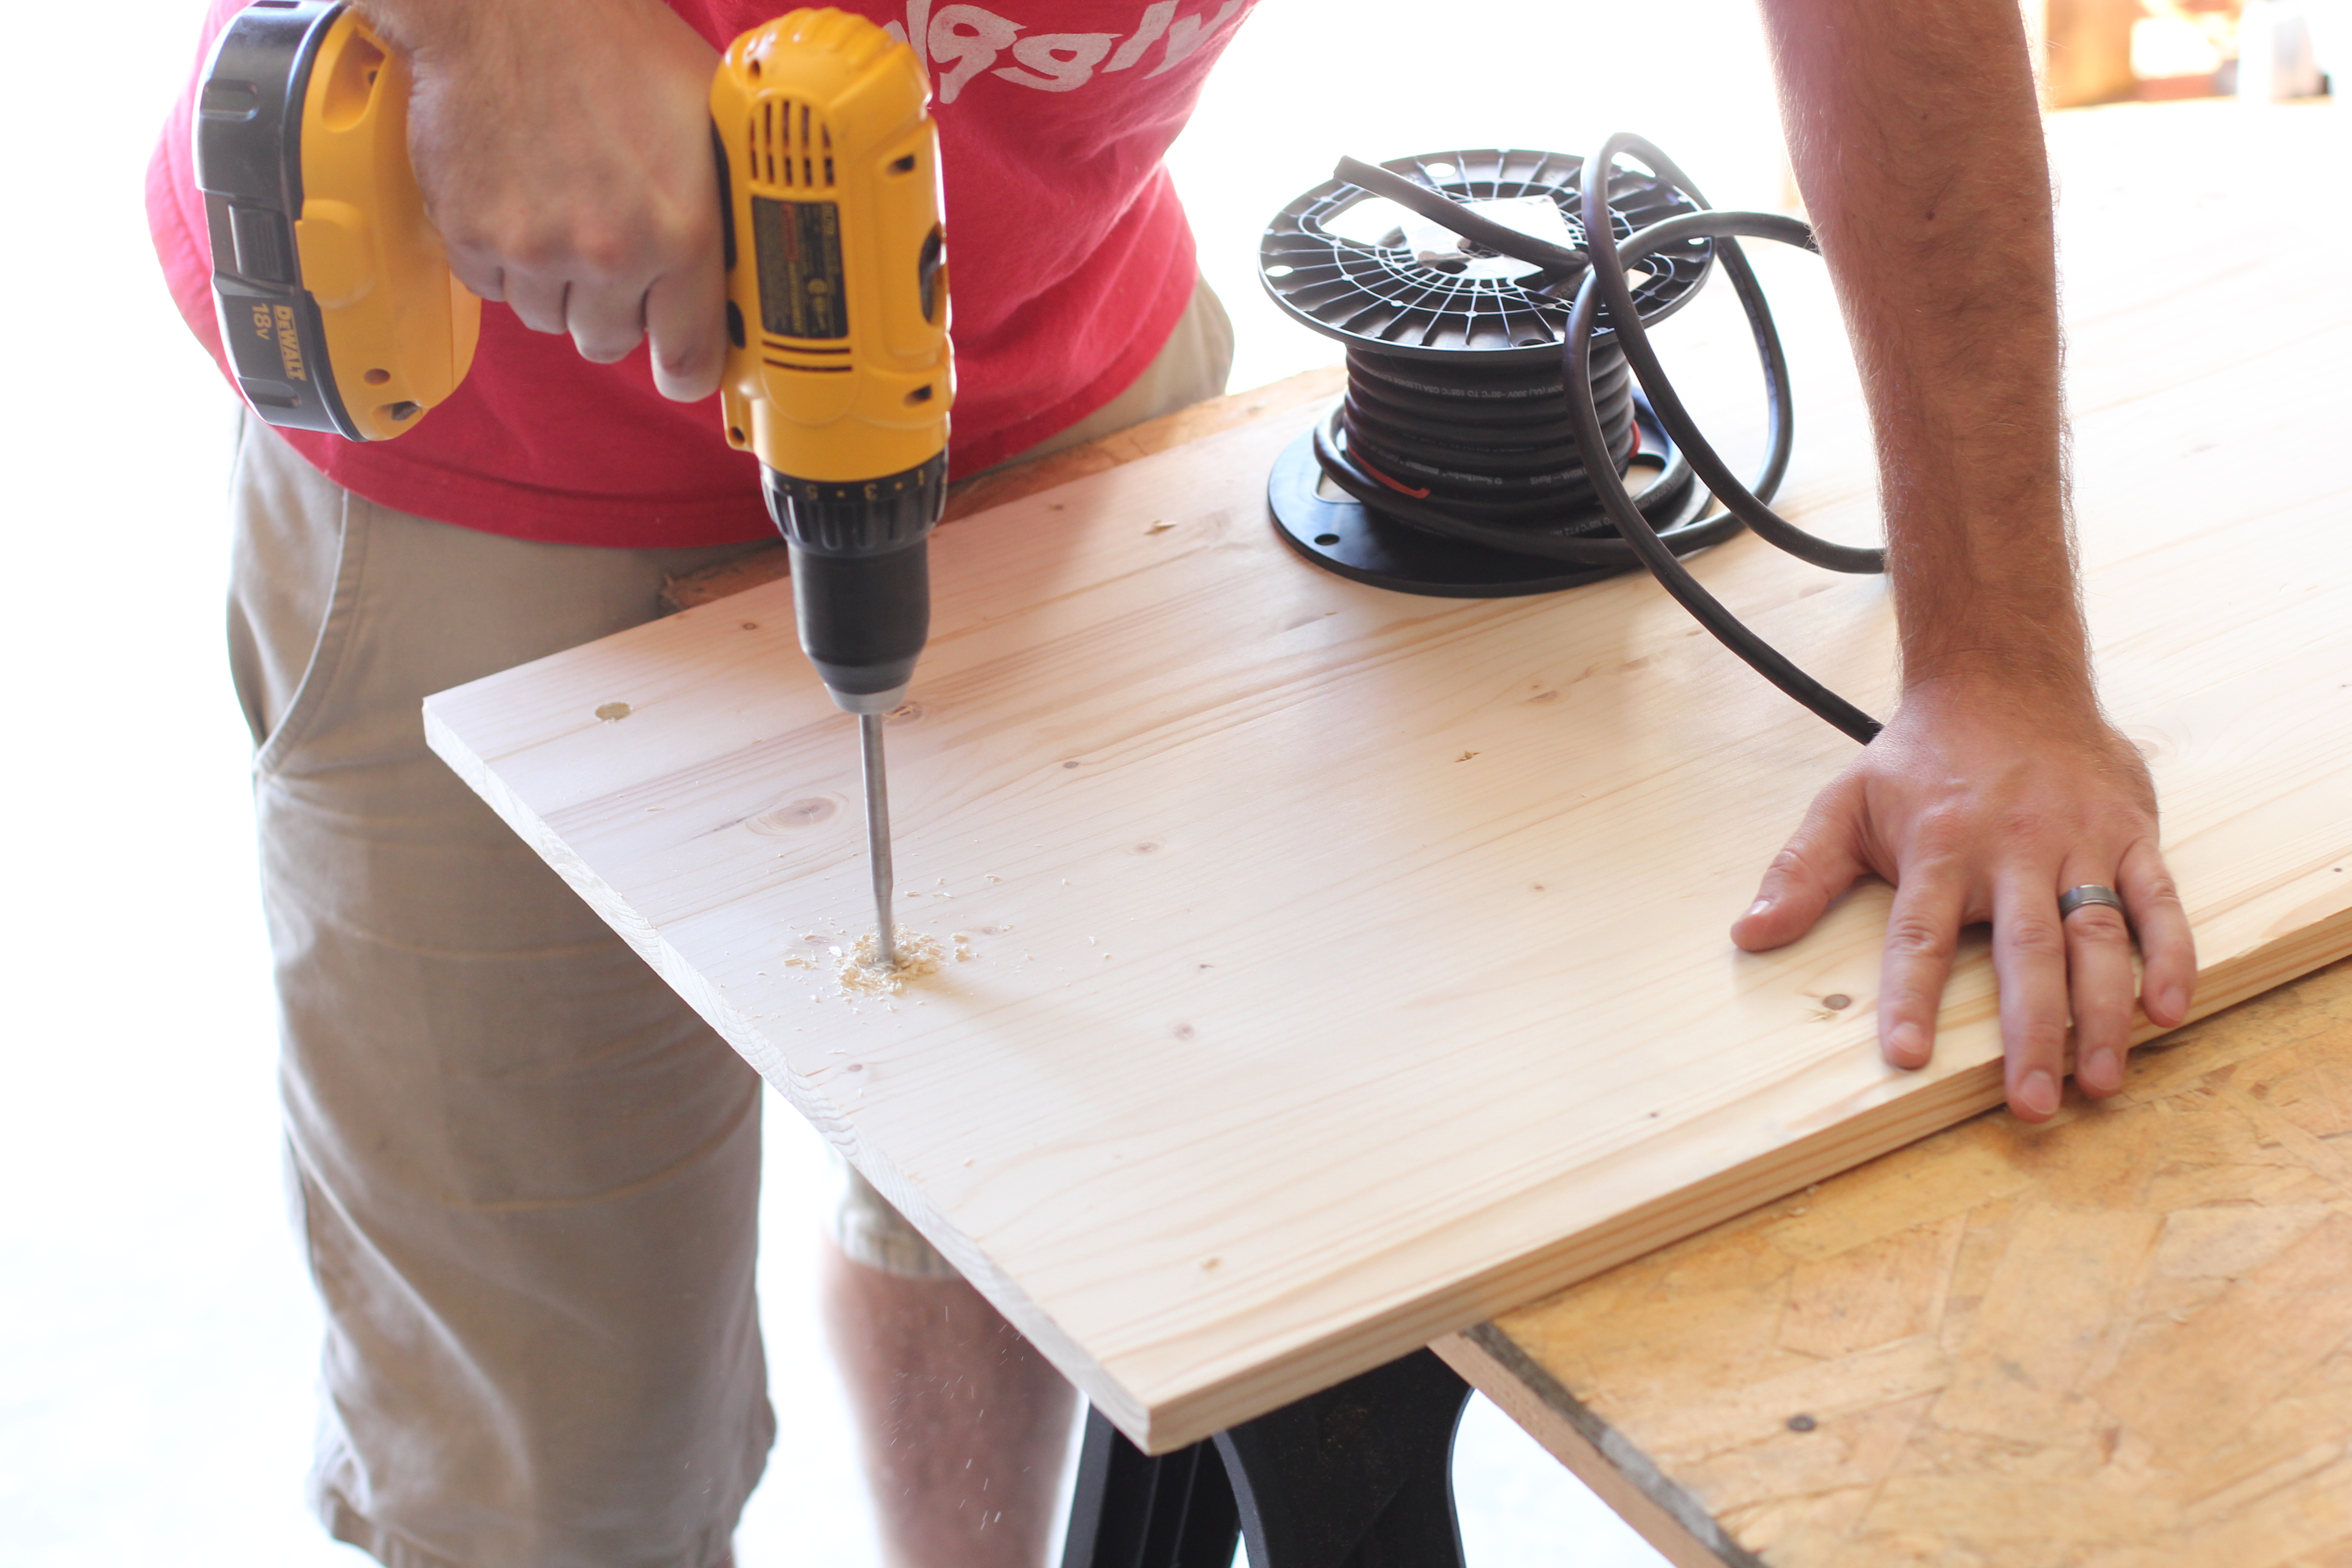
Step 1 // Draw your holes. We’re a little OCD, so we drew a grid, making sure that the holes.were evenly spaced out. We decided on 12 (3 rows of 4).
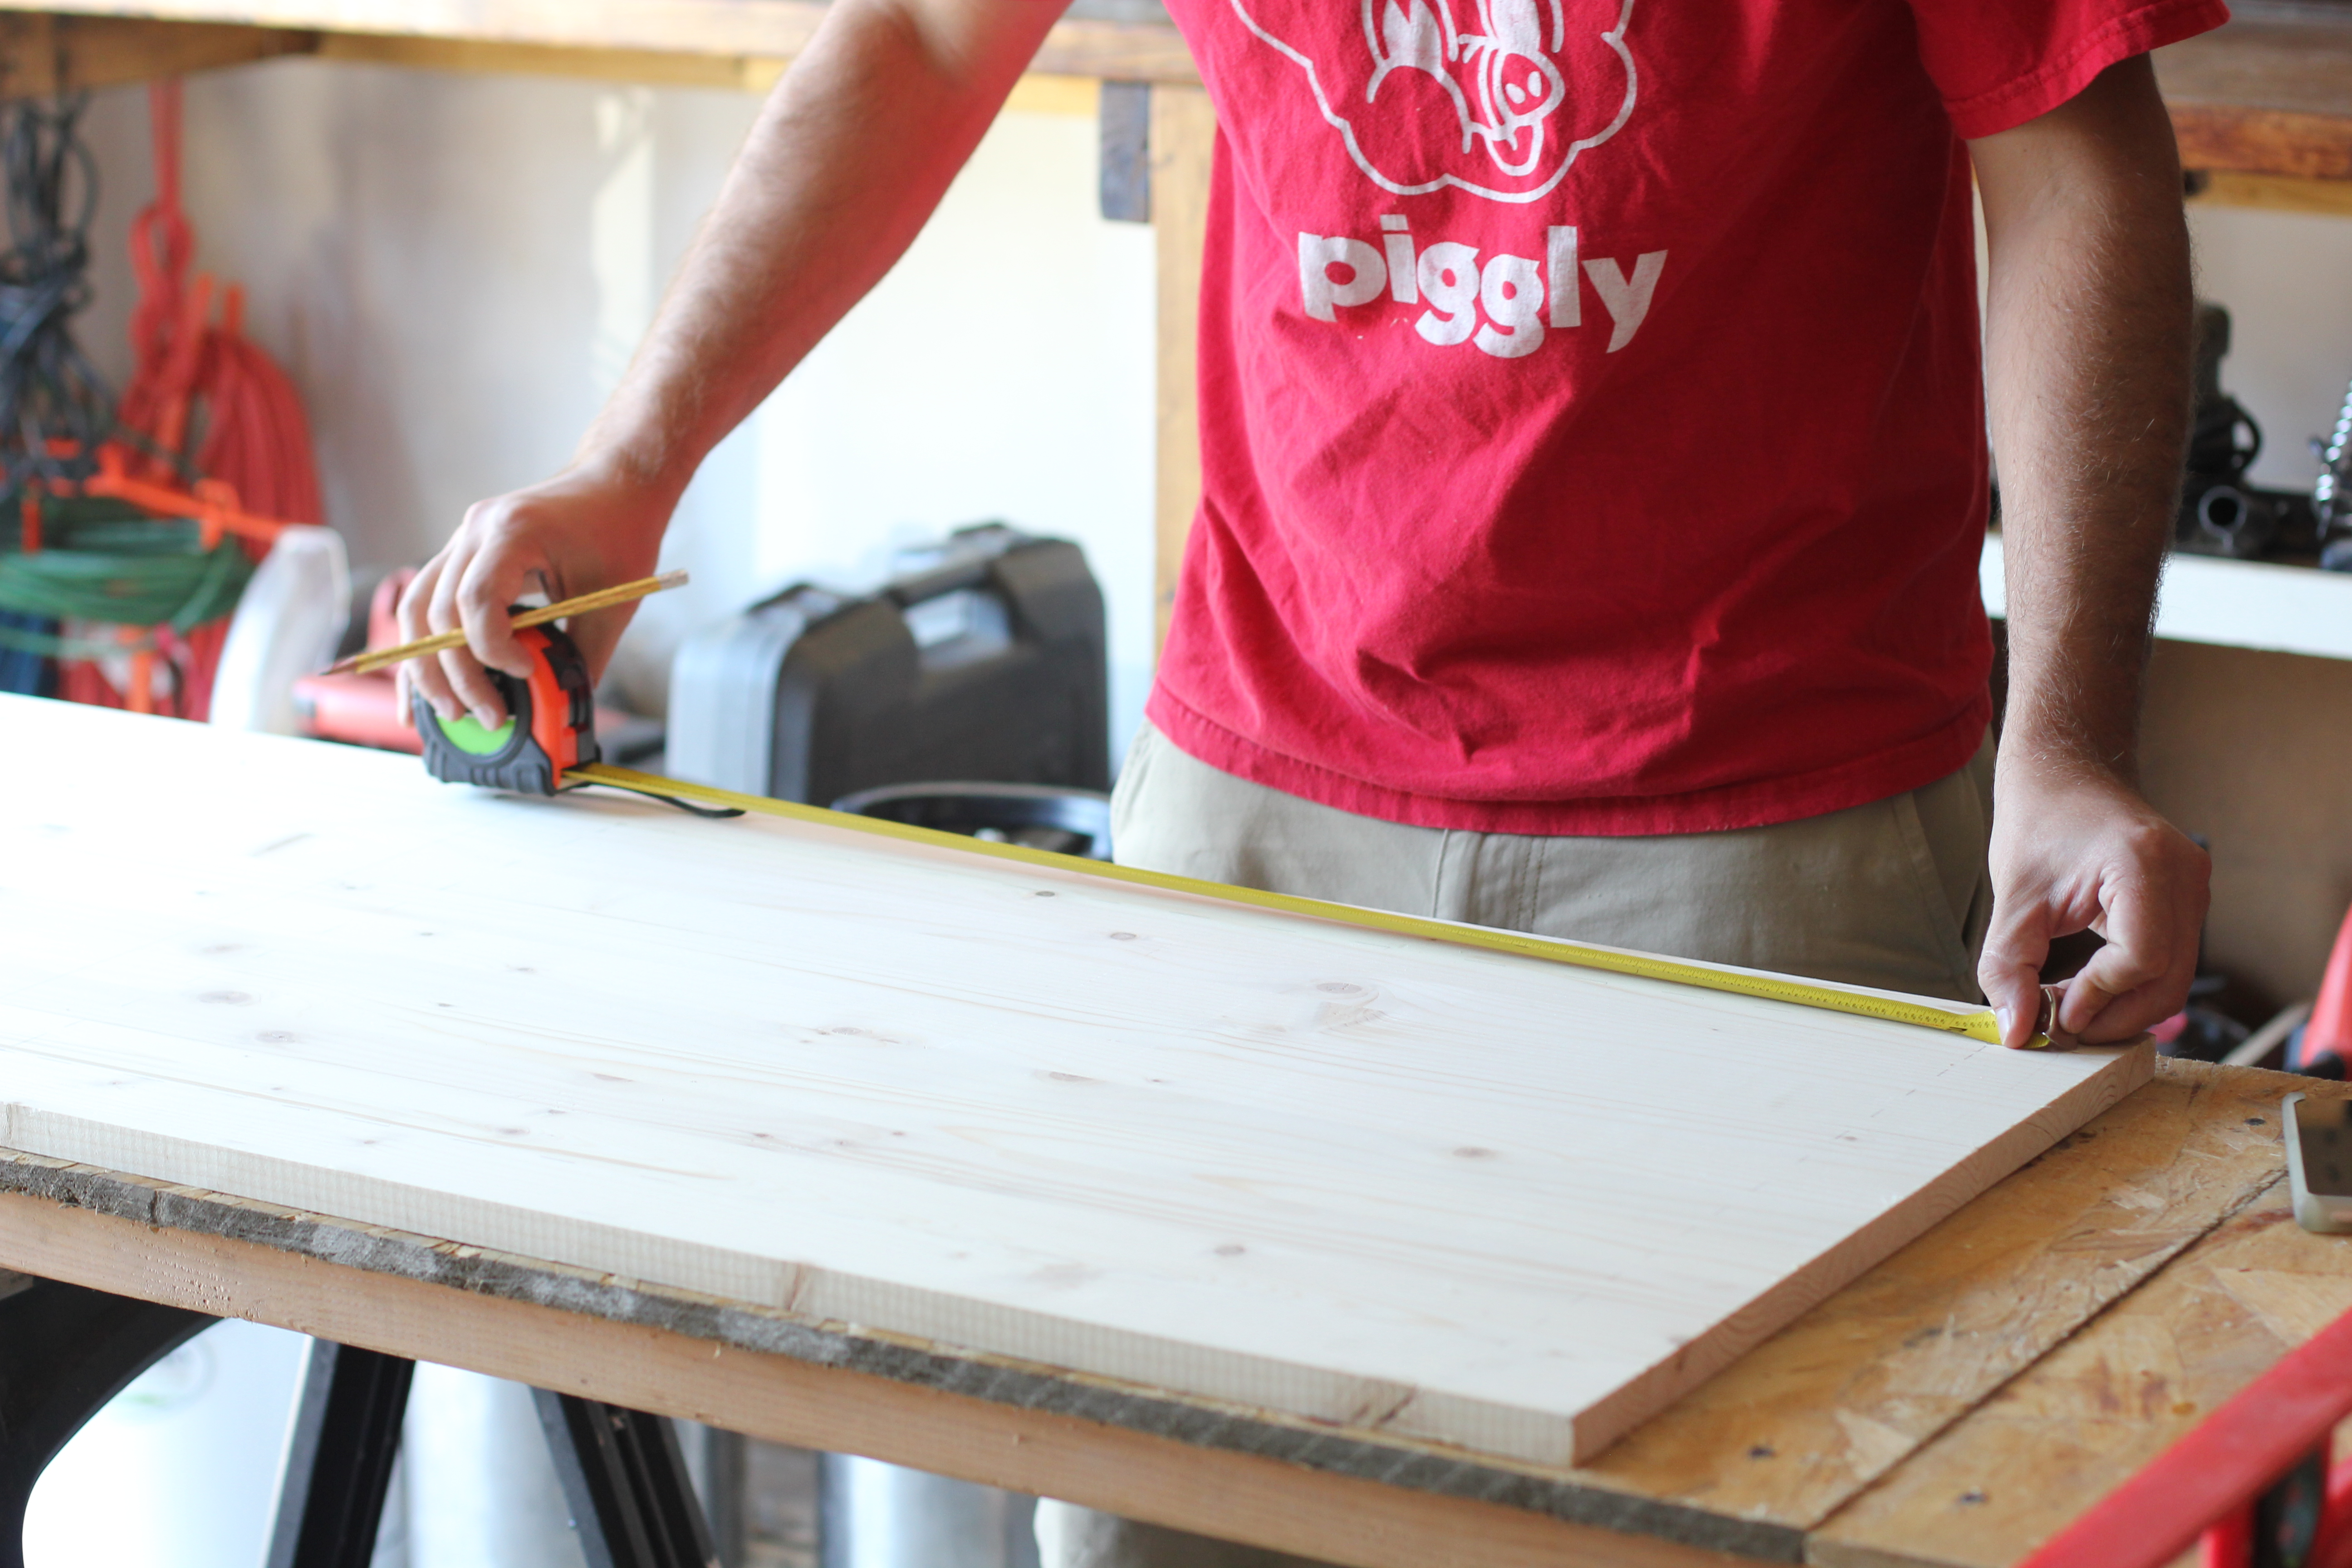
Before drilling the holes in the wood where the lights would be, we put down mason jar lids to represent the lights to ensure we liked the placement.
Step 2 // Drill 12x 9/16 or 5/8 holes.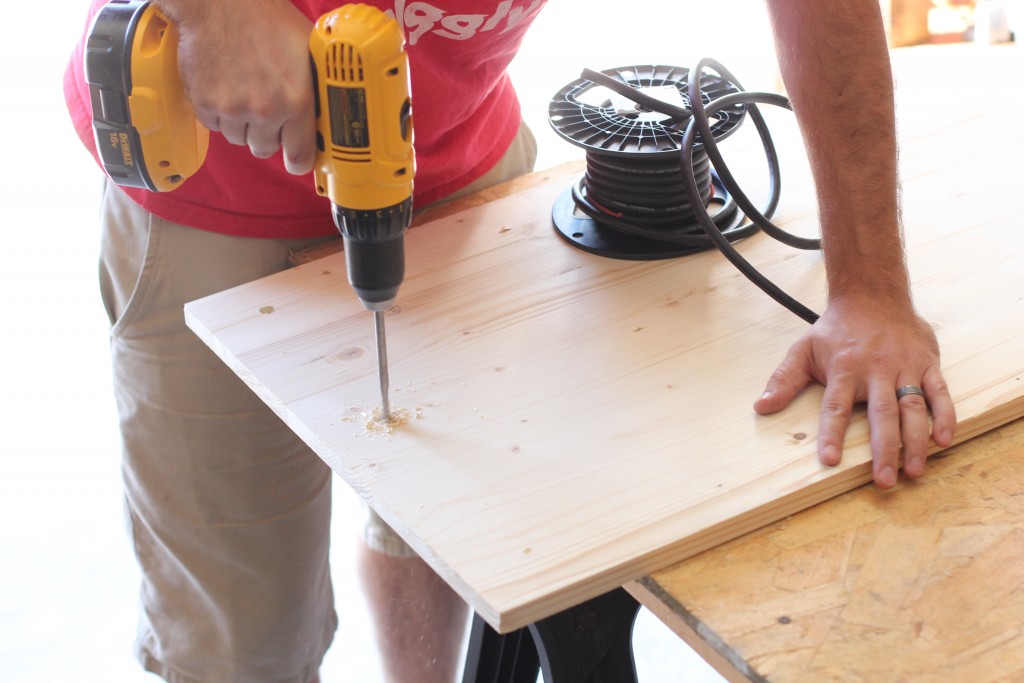
Step 3 // Test fit the wire to ensure it fits into the drilled holes.
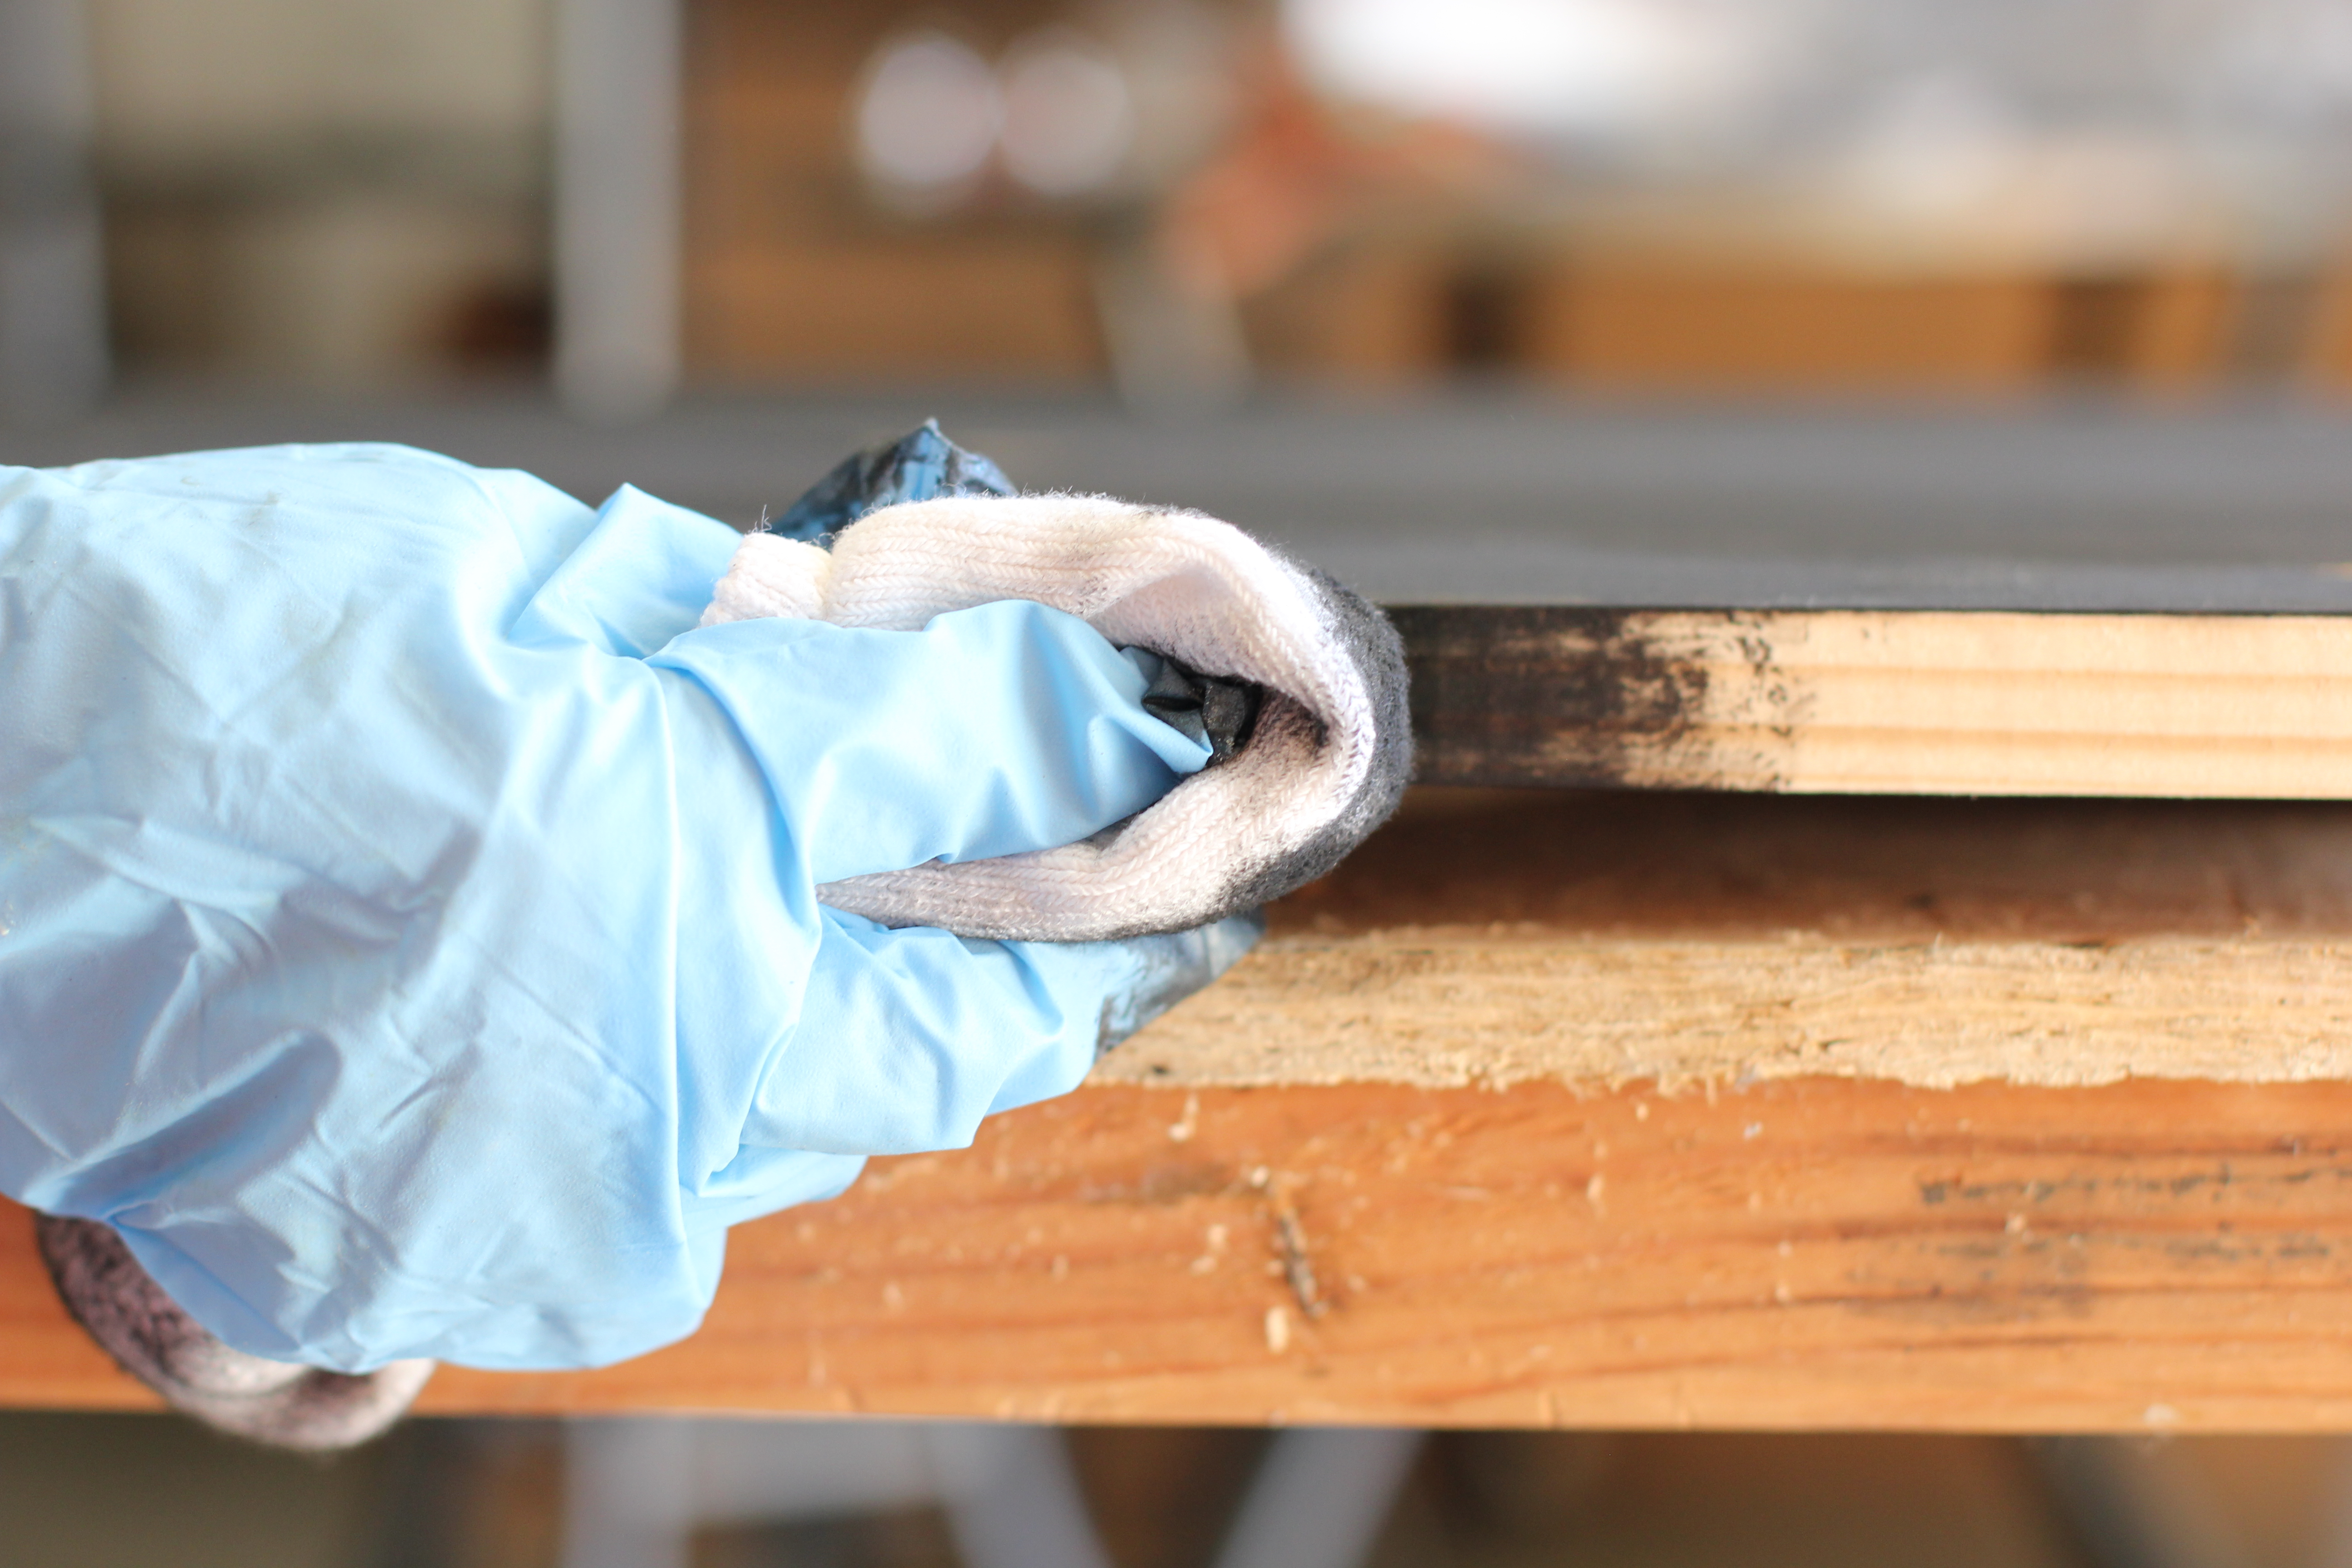
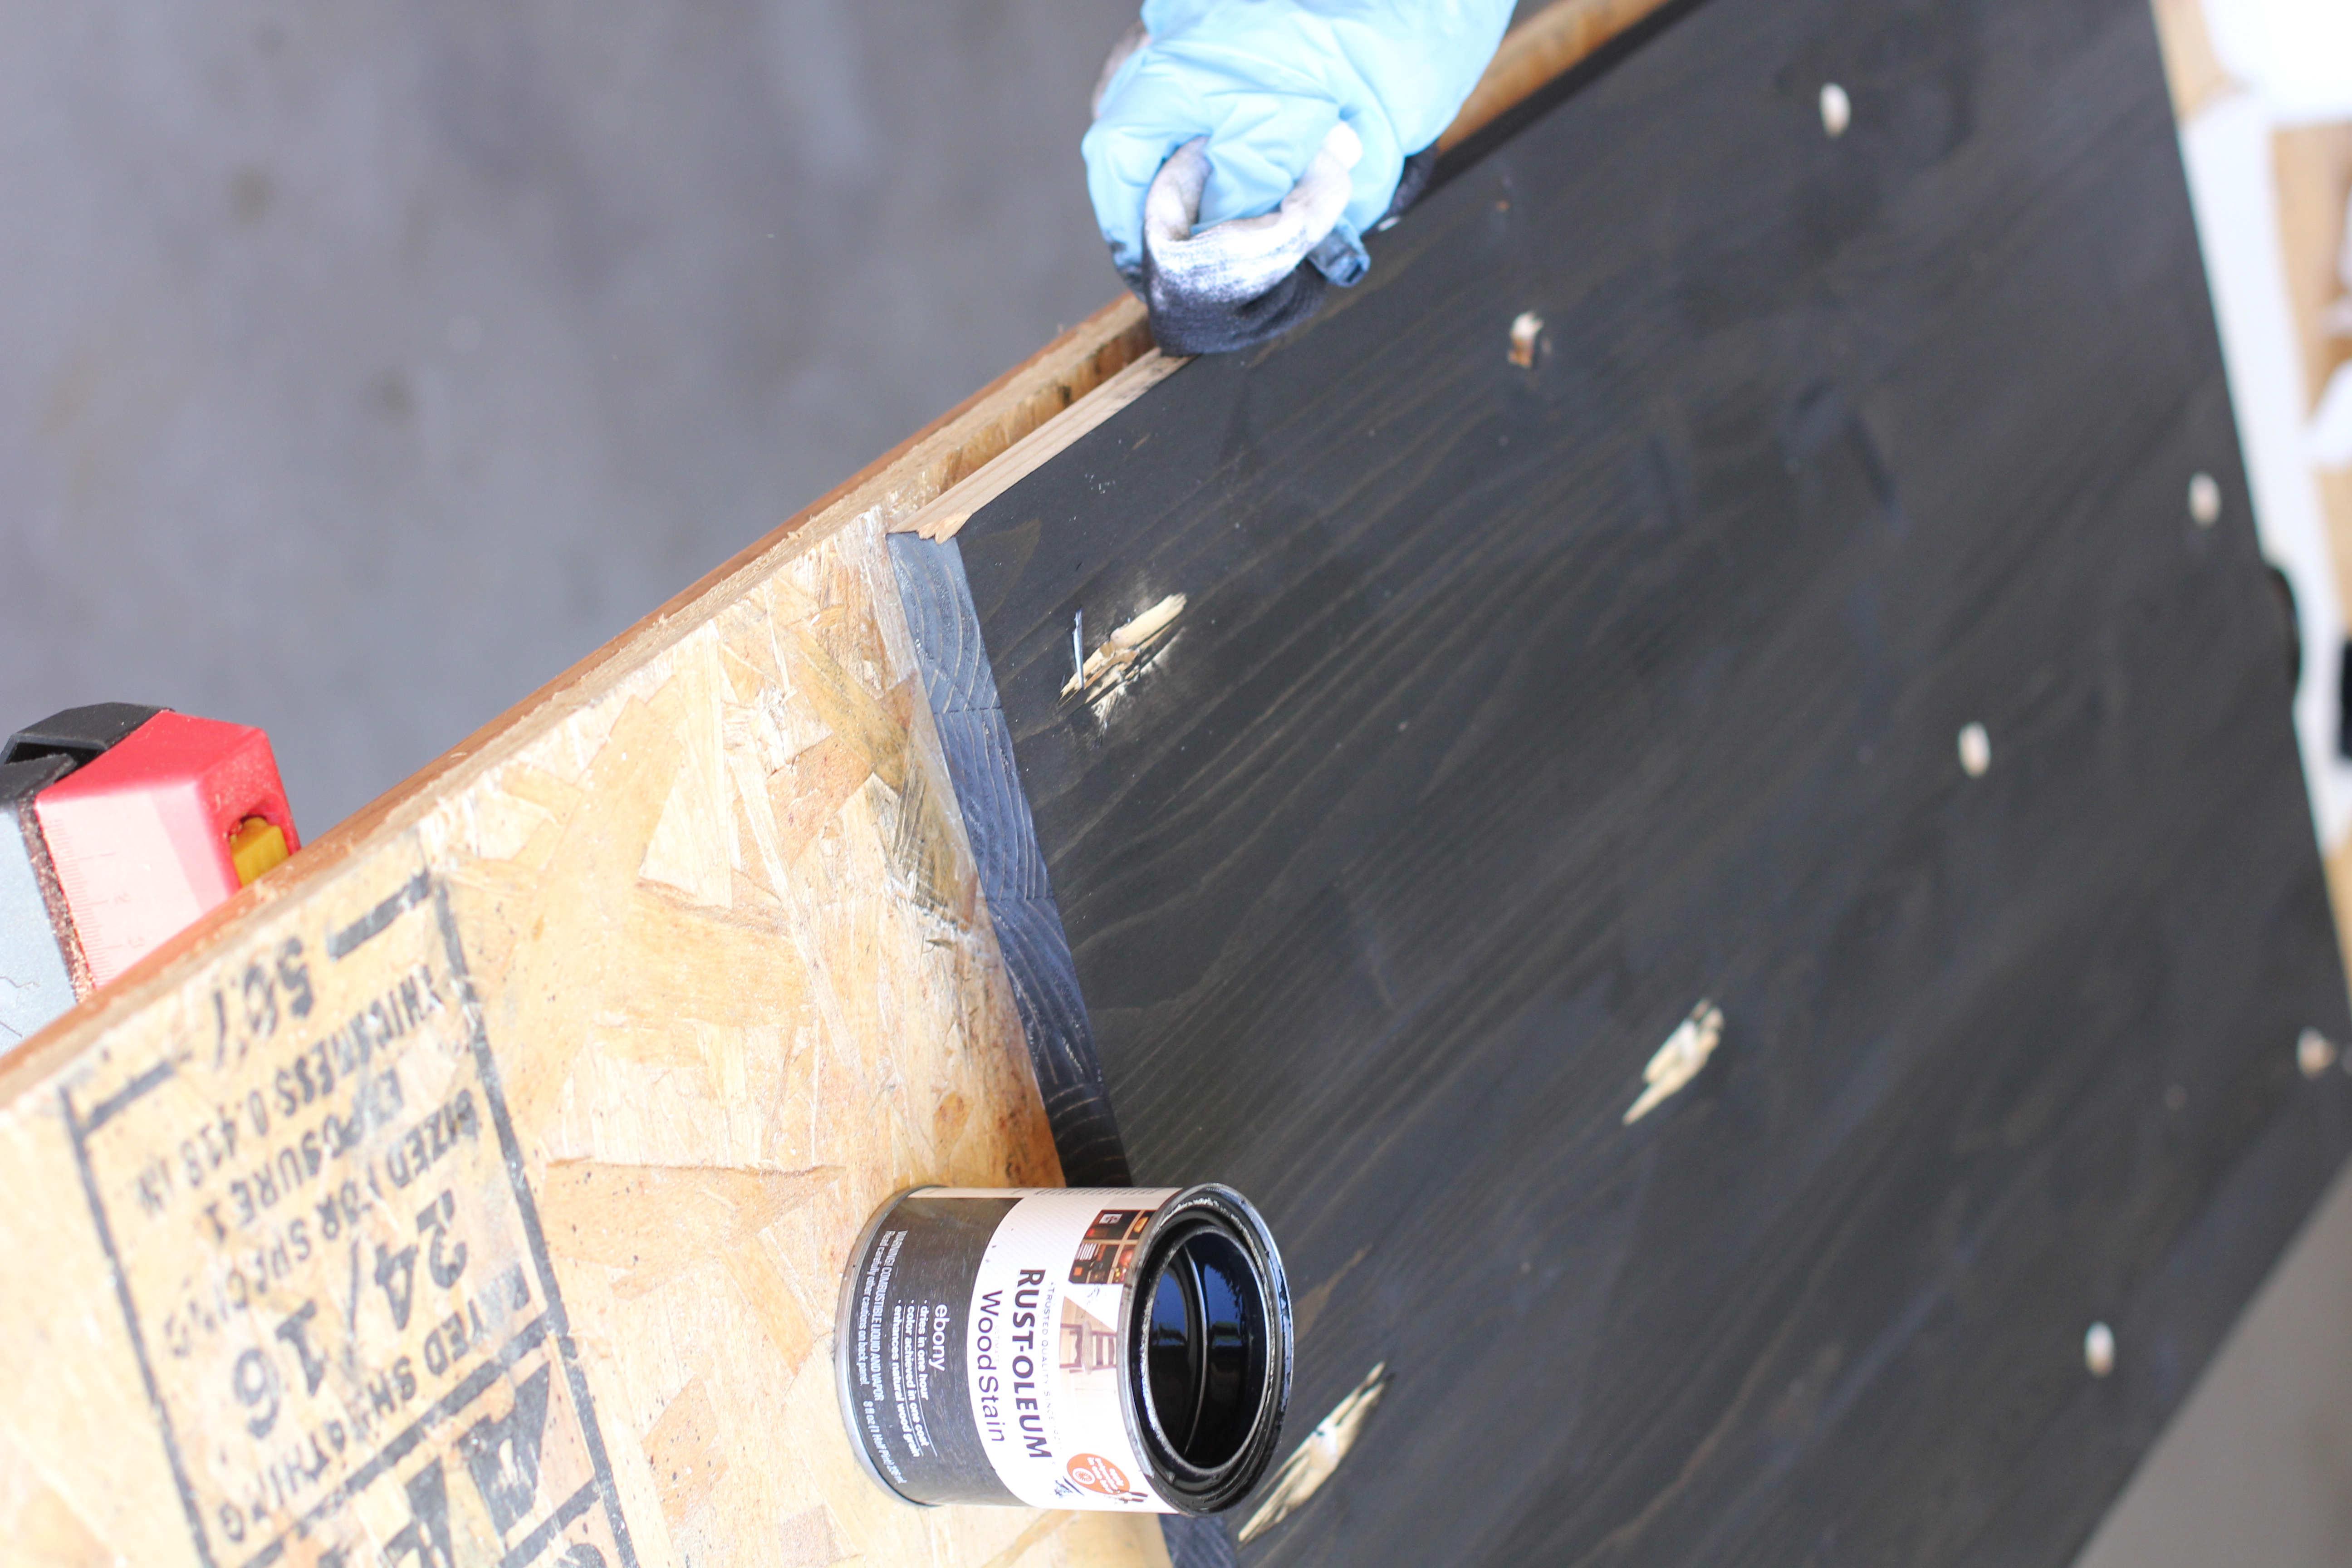
Step 4 // Remove the wires and stain the wood. We chose ebony! Using an old sock creates a thinner coat so you can still see the grain, but you can use whatever you have!
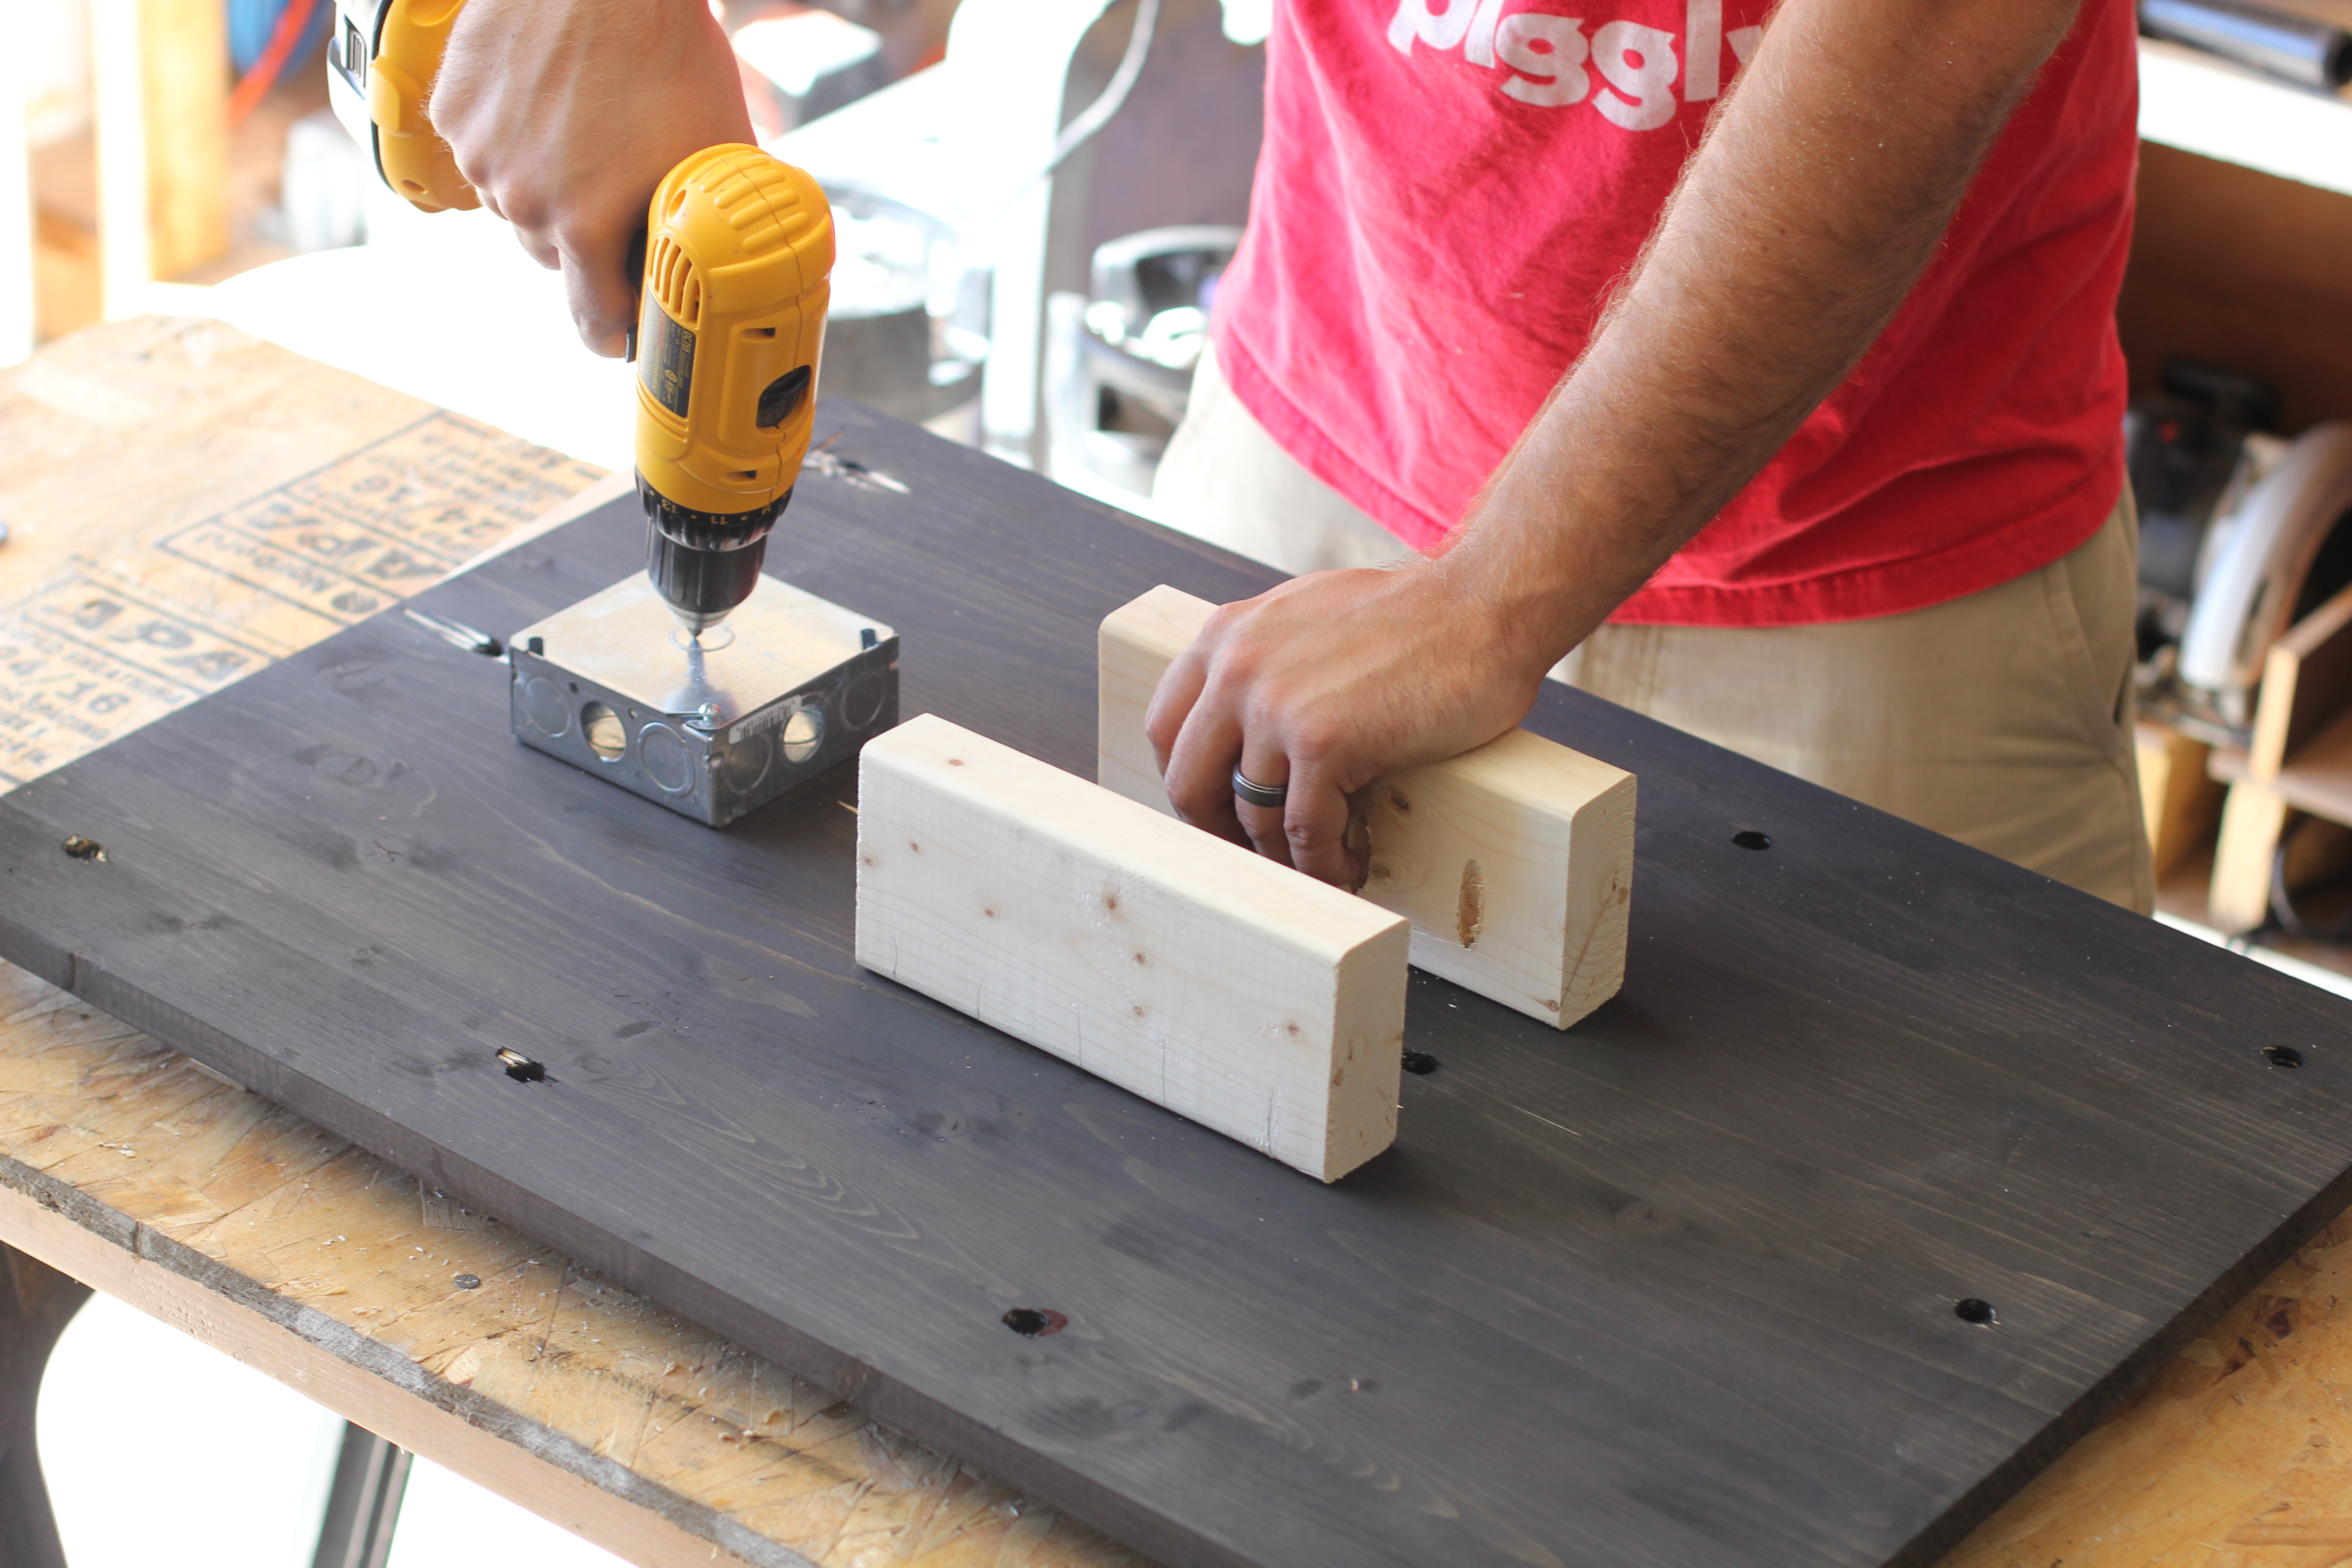
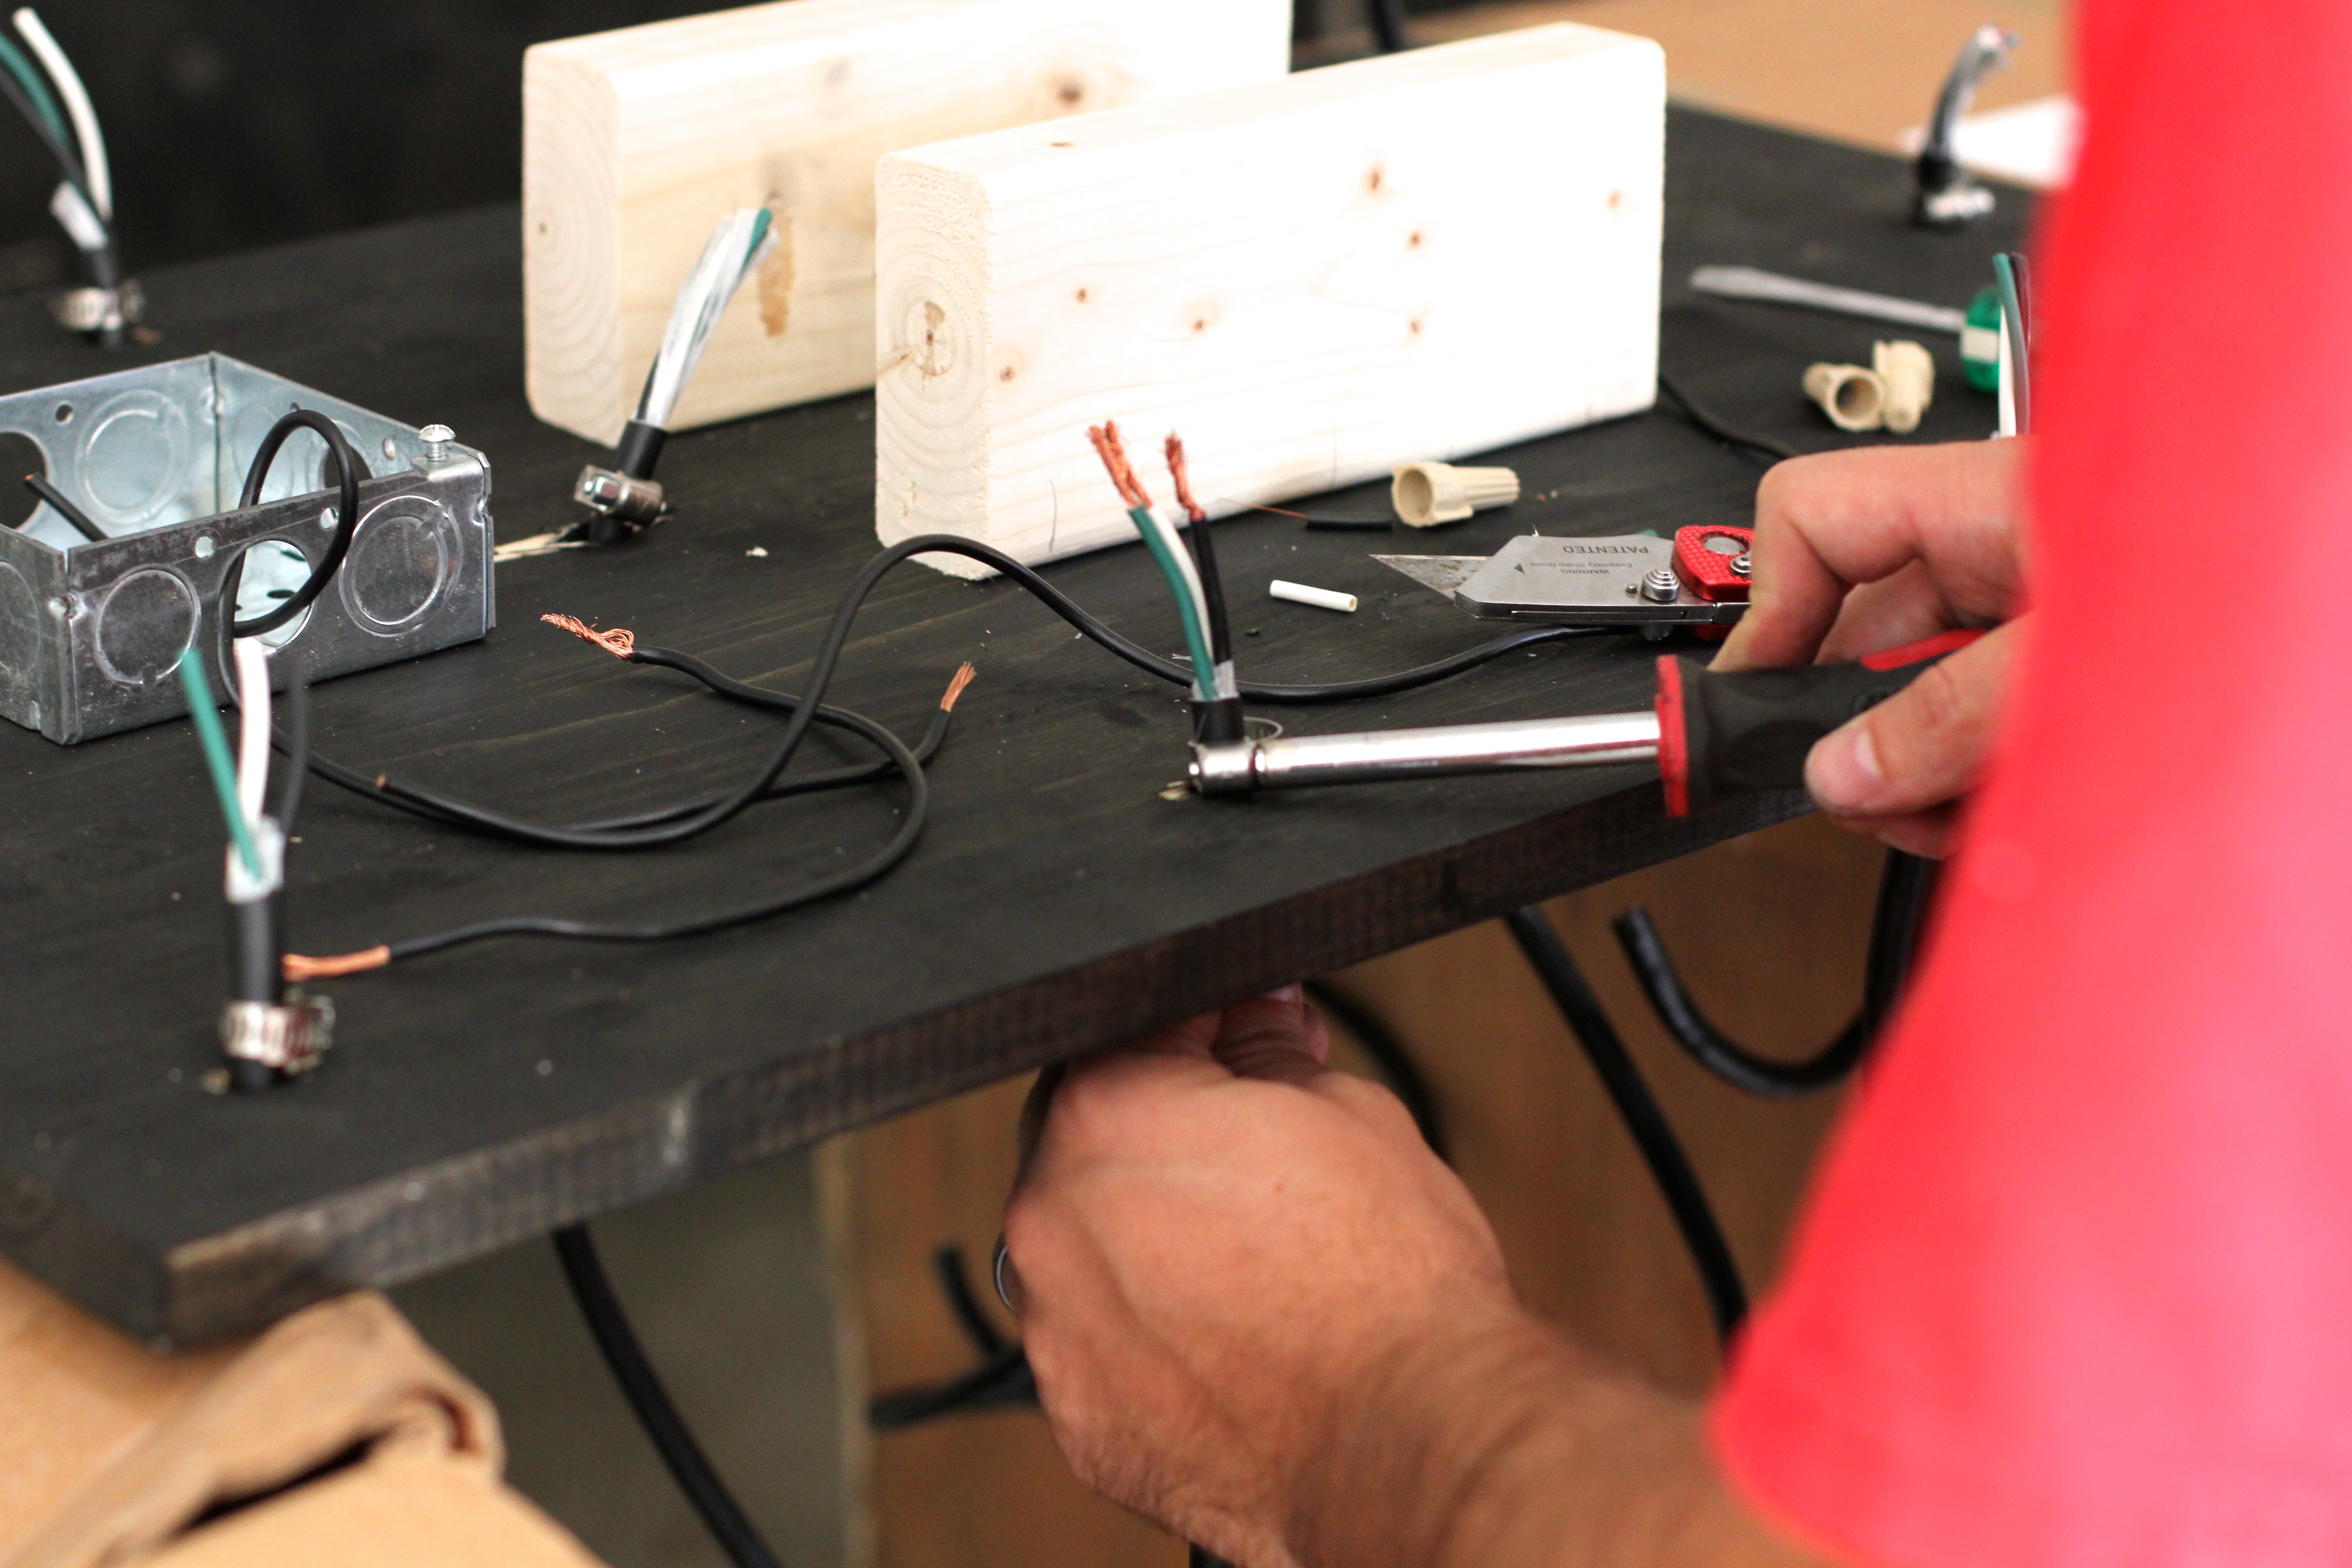
Step 5 // Install junction box and two 8″ 2×4 pieces that will later be used to mount the light to the ceiling.
Step 6 // Feed the 14/3 cable through the holes and cut to the desired length. Make sure you have about 3-4 inches of cable sticking up out of the hole above the light. We will later “pig-tale” all of these cables together. We chose to cut the cables to different lengths; ranging from 14-24 inches. (Note: It was easiest to calculate how many strands we would get per roll of wire so that we didn’t run out)
Step 7-8 // Fasten with hose clamps around the top of the cable above the light so that the wires don’t fall through the holes. Then cut the cable, remove the sheathing and strip wires.
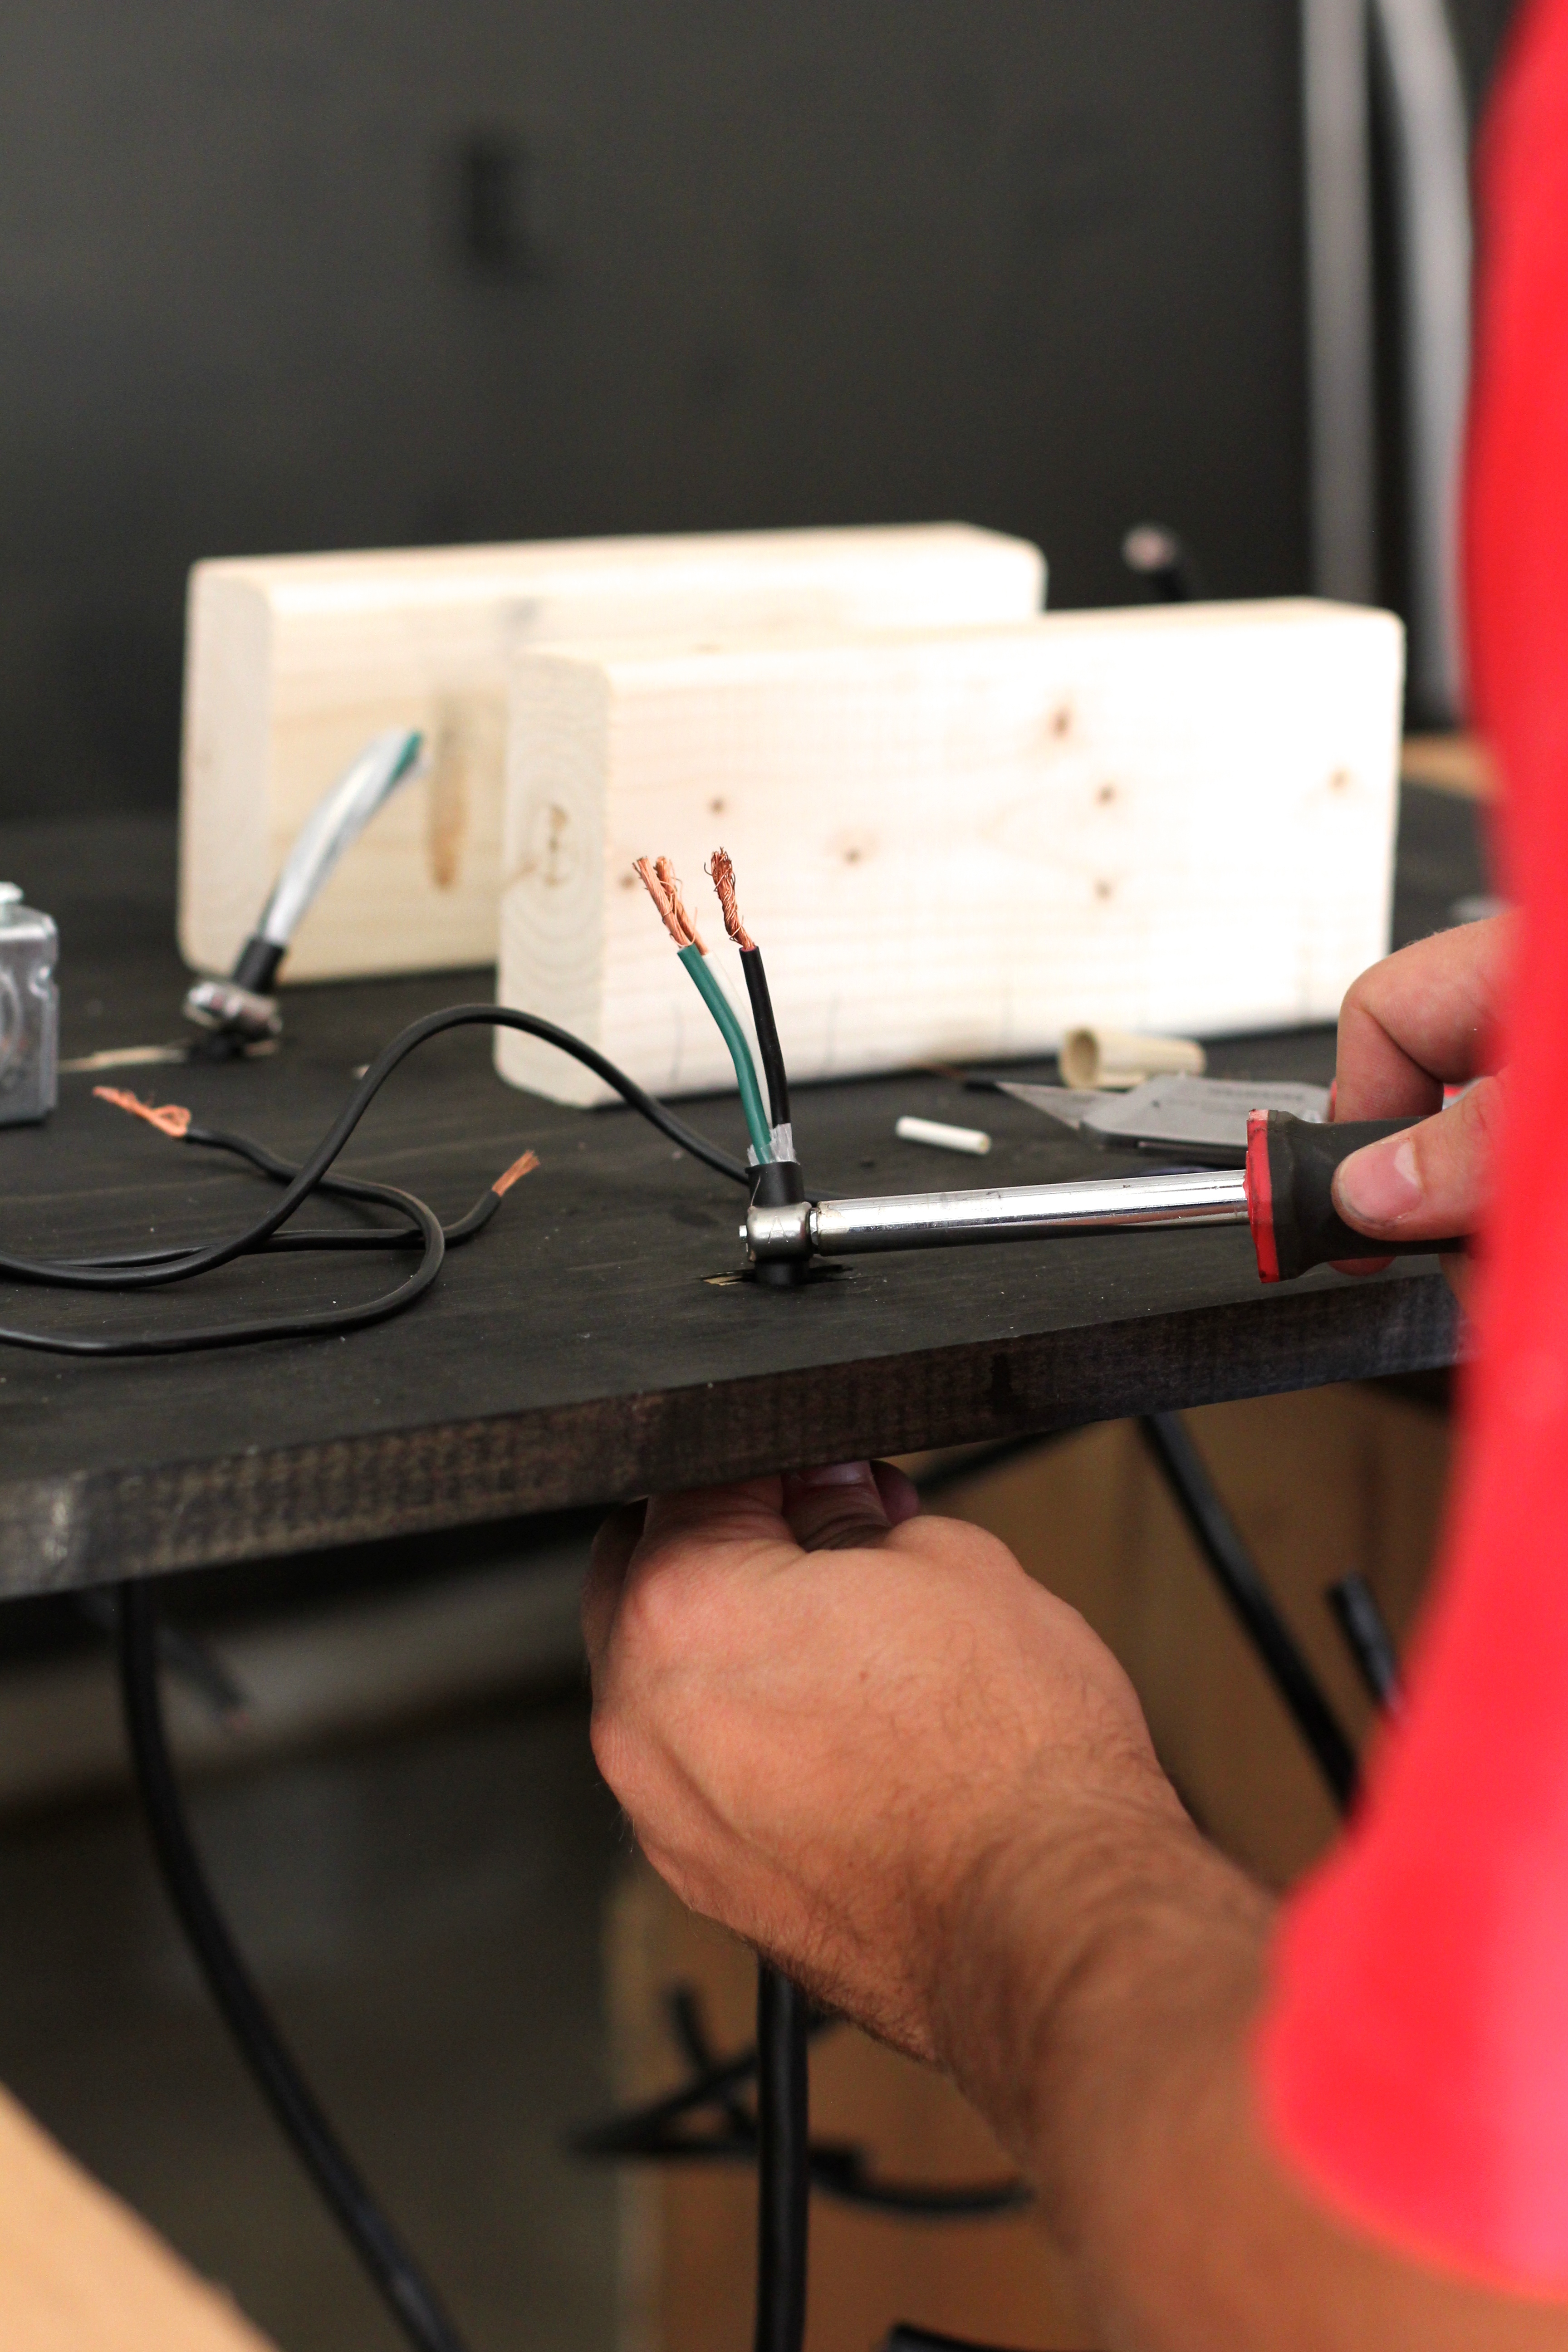
Step 9 // Connect all wires together with the white and black 14 awg wire, accordingly, and then route them to the junction box.
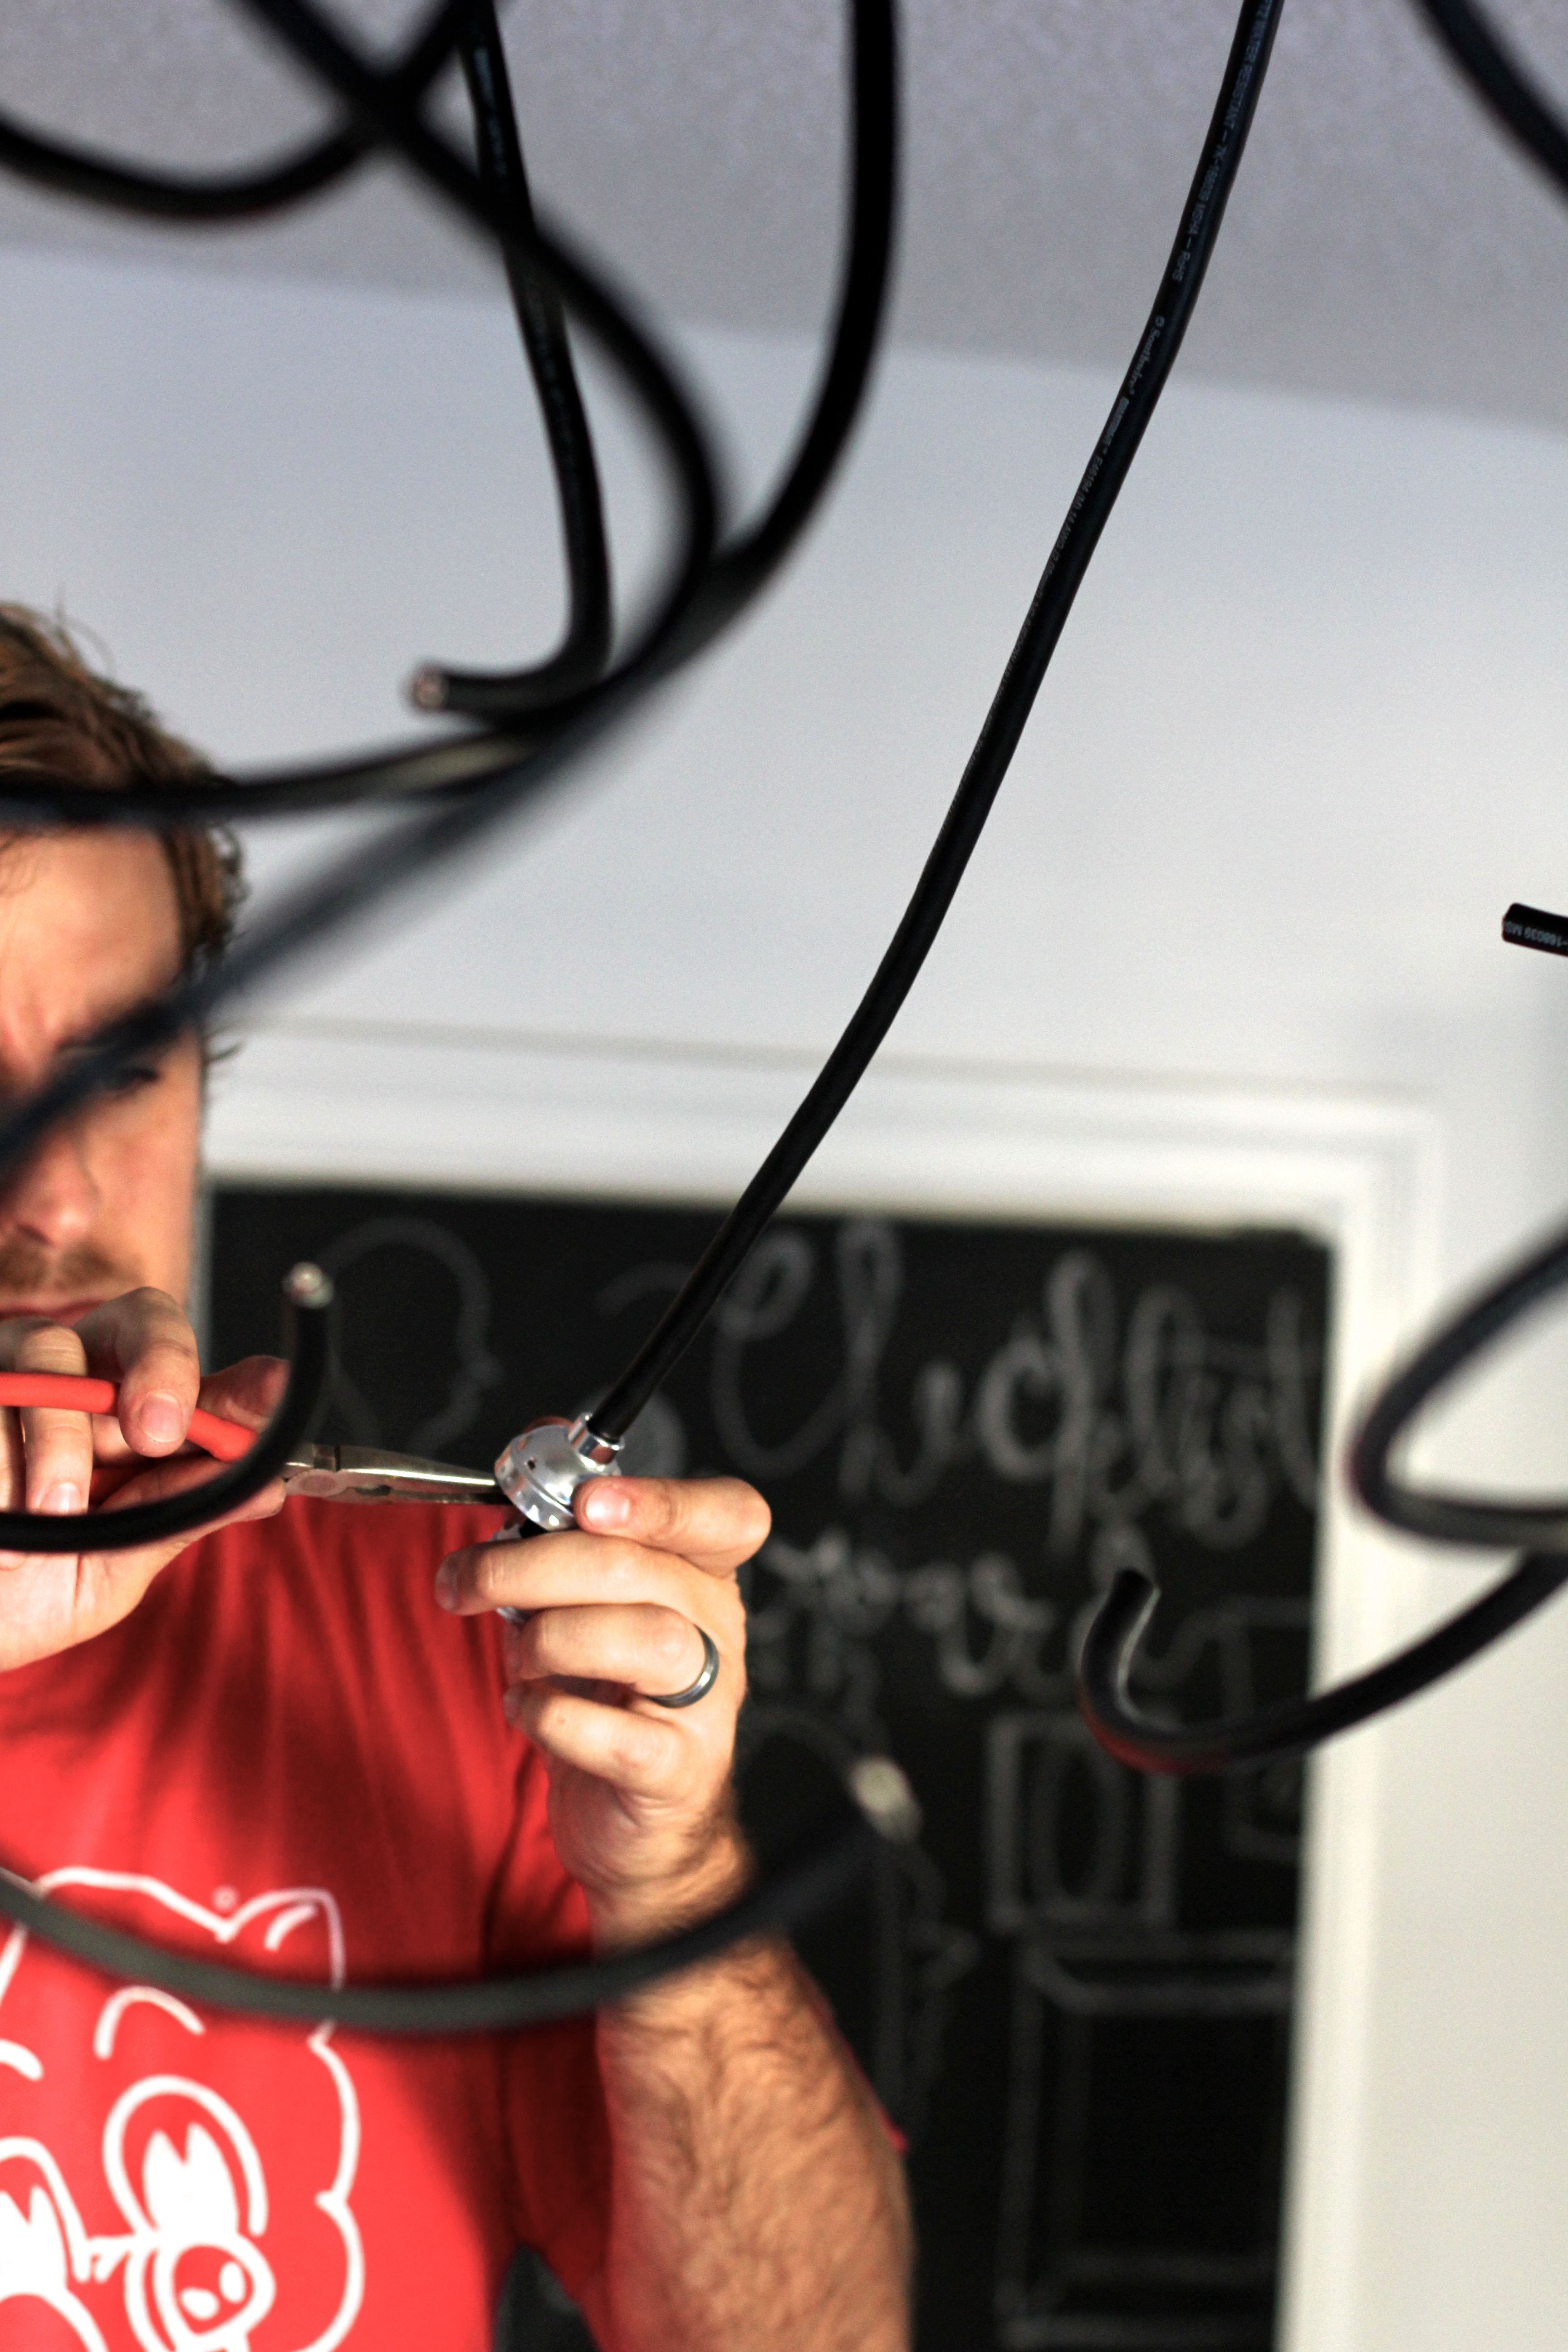
Step 10 // Install light fixture to ceiling. (Picture not shown) Install another scrap piece of 2×4 into the ceiling where you will be hanging it. This will be the middle piece for the two 8 inch pieces, connected to the fixture, to be secured to.
Step 11 // With breaker off, install sockets to each individual wire. We chose to rotate between silver and gold sockets.

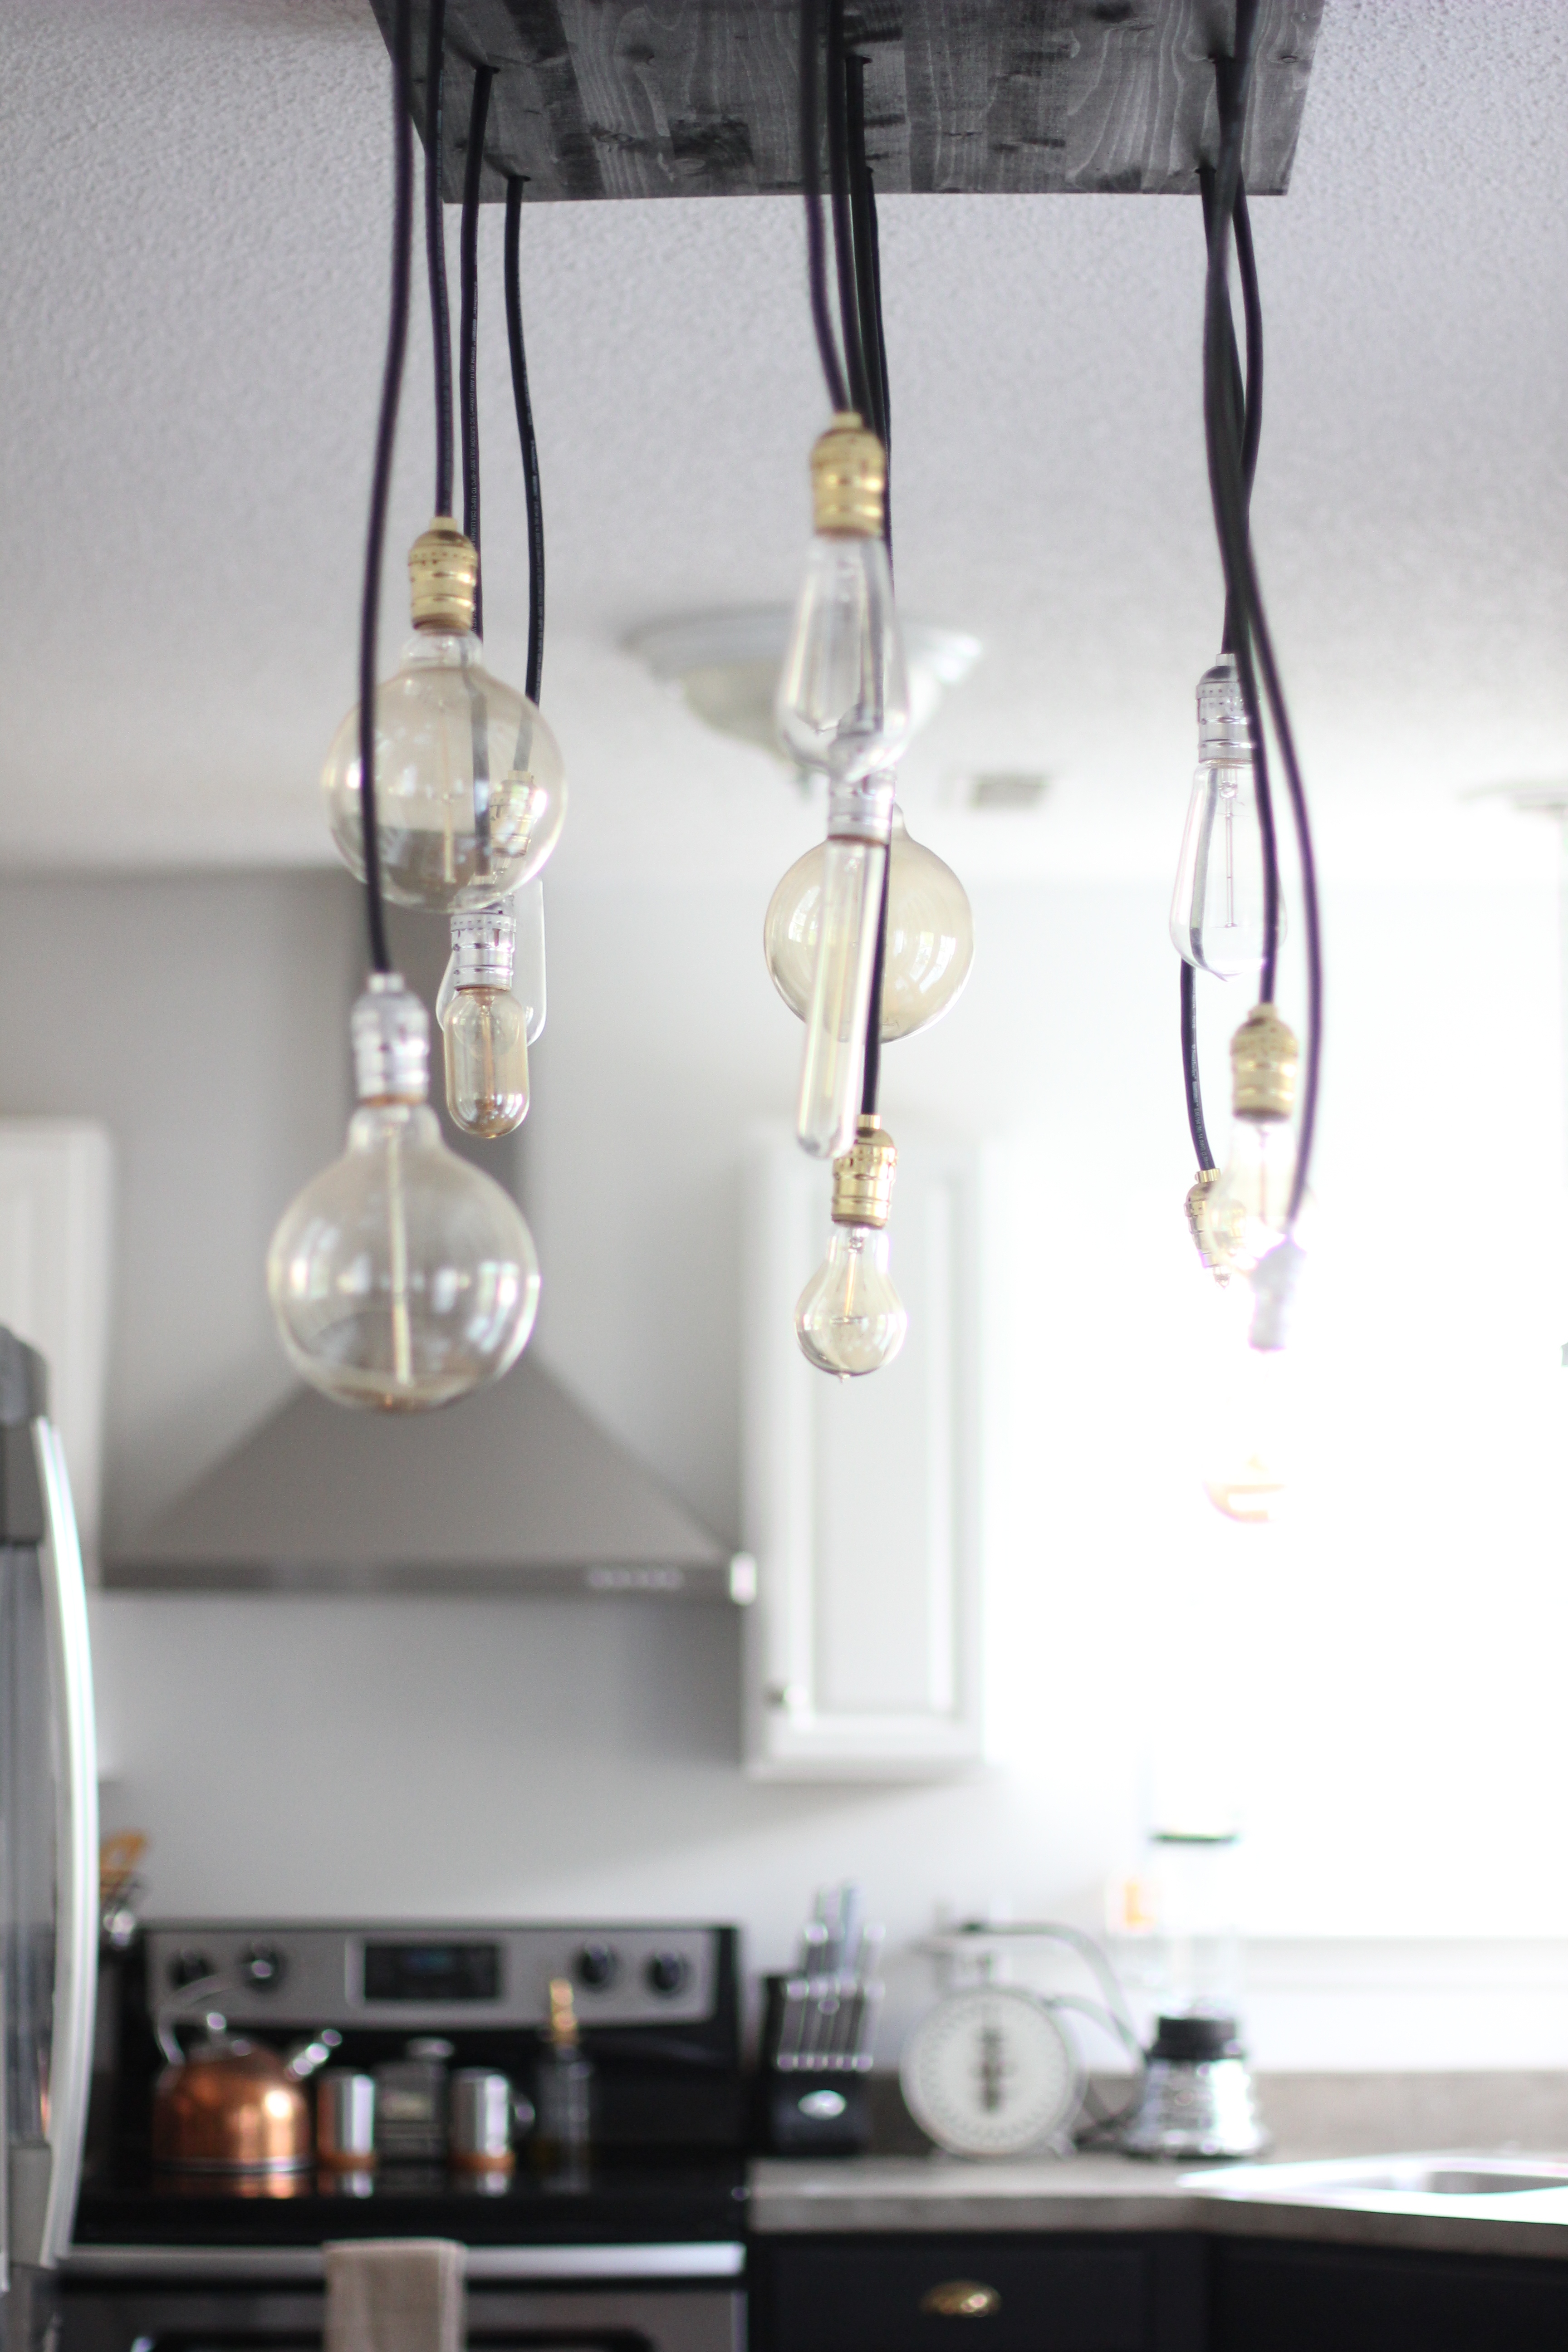
Step 12 // Time to install the bulbs! Have fun with it! Choose a bunch of different vintage bulbs, but be sure to get at least 40W for each one. You’d be surprised how little these babies give off light (but man, do they give off some heat!)
I hope you enjoyed this tutorial! Please let me know if you have any questions!
We love this industrial light fixture and it’s exposed Edison bulbs. It compliments our loft style kitchen very well and we owe it all to this Etsy shop owner who inspired us! If you don’t want to make one yourself, these are great options to buy for a decent price!

Don’t forget to cast your vote for the Bloglovin’ Awards!!! I’m notimated for Breakthrough Fashion Blogger of the Year!


I really like the mix of light bulbs!
xoxoBella | http://xoxobella.com
Nice photos 🙂
BLOG M&M FASHION BITES : http://mmfashionbites.blogspot.gr/
Maria V.
how beautiful this looks
http://www.thefashionfraction.com
Seriously amazing DIY!
Sofia | palelily.blogspot.com