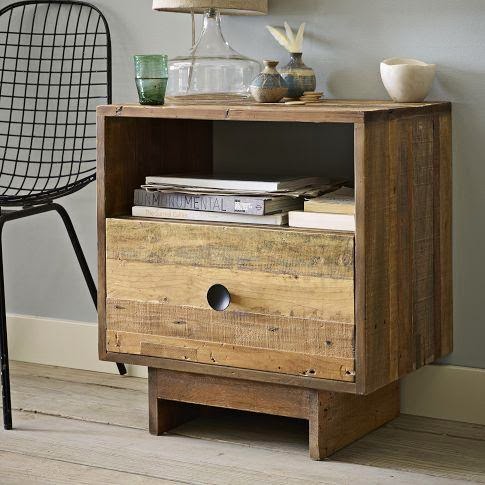
So we came across this beauty on West Elm and I just HAD to have it!
..but not for $349.
$349!!… Made from recycled pallet wood!
I always say “psh. I can make that” if I think the price is too outrageous to pay. And usually, I can’t really make it, but it makes me feel better that I can’t get it lol
Turns out my, my husband actually could! And I was surprised to find it beside our bed when I came home one day. Now I helped him make the other one. Here it is!
 |
Here’s how we did it..
Things you’ll need
Kreg jig (already owned – $100)
screws/nails $6
screwdriver (drill)/hammer
drawer hardware (used from old set of cabinets)
knob (used from old set of cabinets)
Steps
1. josh and i went pallet wood shopping. which means, driving around, looking behind dumpsters 😉 we found a large pallet and started separating the wood.
As much as i like using a hammer and crowbar to do that..we found this way much easier..
hey, if you have the tools, why not?!
2. Measure and mark your boards to the desired length using chalk. We went by West Elm’s measurements they had listed in the description of the product 😉 (22″w x 15″d x 24″h) We used 4 boards, approximately 4 inches wide and 1/2 thick, to create all sides. The only difference was the length. *Do not cut to the length yet! *Label the boards; side, bottom, top, etc.
3. we (and when I say we, I mean josh) used a kreg jig to join the pallet wood together.
6. Next, install the divider and make the drawer!
Drawer
create the bottom, 2 sides and back of drawer using the same process as we did for the frame.
We used nails that we salvaged from the pallet to mount the front face of the drawer, to the drawer. Again, we found it easier to drill small pilot holes so that the old nails didn’t bend. Josh says to make sure you’re up to date on your tetnis shots 🙂
Then install your hardware so that the drawer will slide in nice and easy, screw in a knob, and you’re all set!
What do you think?! Is it West Elm?!
 |
| [left] West Elm Pallet Wood Nightstand – $349 // [right] DIY Pallet Wood Nightstand – $6 |
I hope you enjoyed this tutorial and are able to recreate this table! It’s so surprisingly sturdy and I love it better than the perfect, purchased ones we had originally in our bedroom 😉
Dannon
